Title: 1/32 Scale Stinson Gullwing..............................(Completed 2 July 2017)
Post by: lastvautour on May 08, 2017, 09:11:49 PM
Post by: lastvautour on May 08, 2017, 09:11:49 PM
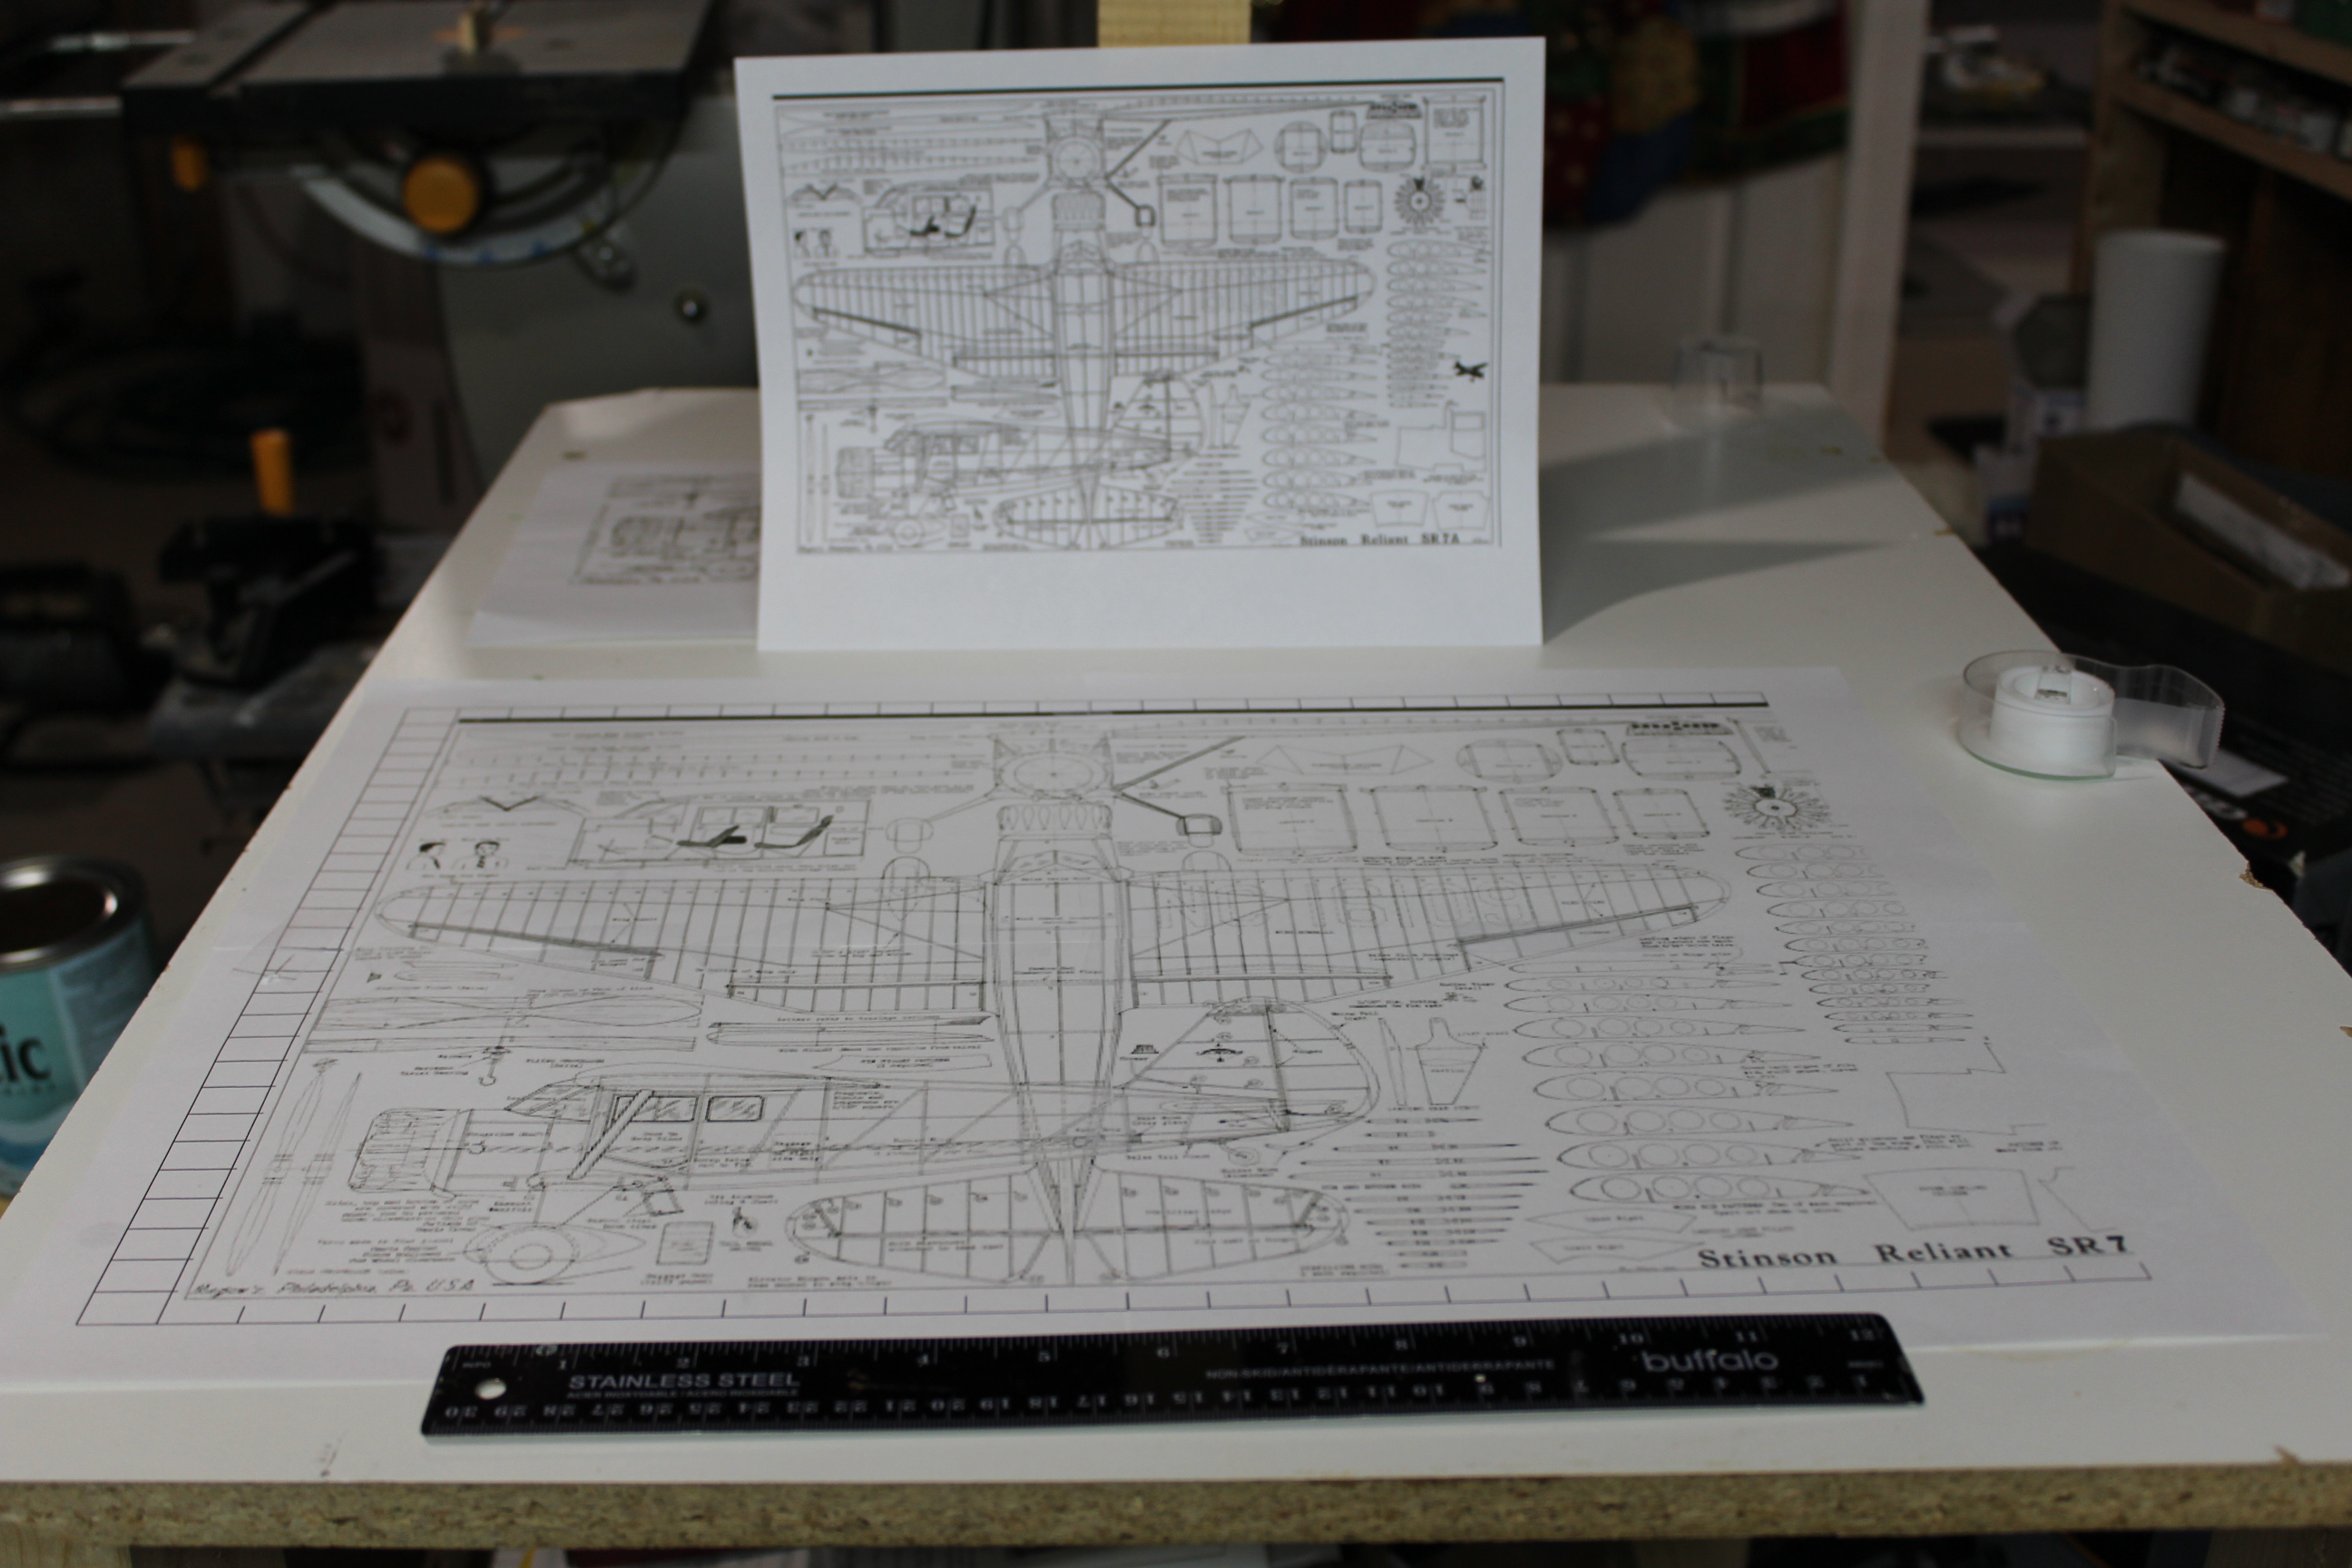
The start of a new project that will simultaneously post to my Facebook page. Drawings have been scale from a rubber power scale flying model and lots of pictures. I have already chosen the serial number CF-RXE at http://www.airport-data.com/aircraft/CF-RXE.html
Lou
Lou
Title: Re: 1/32 Scale Stinson Gullwing
Post by: lastvautour on May 09, 2017, 12:28:57 AM
Post by: lastvautour on May 09, 2017, 12:28:57 AM
Making a model part two.
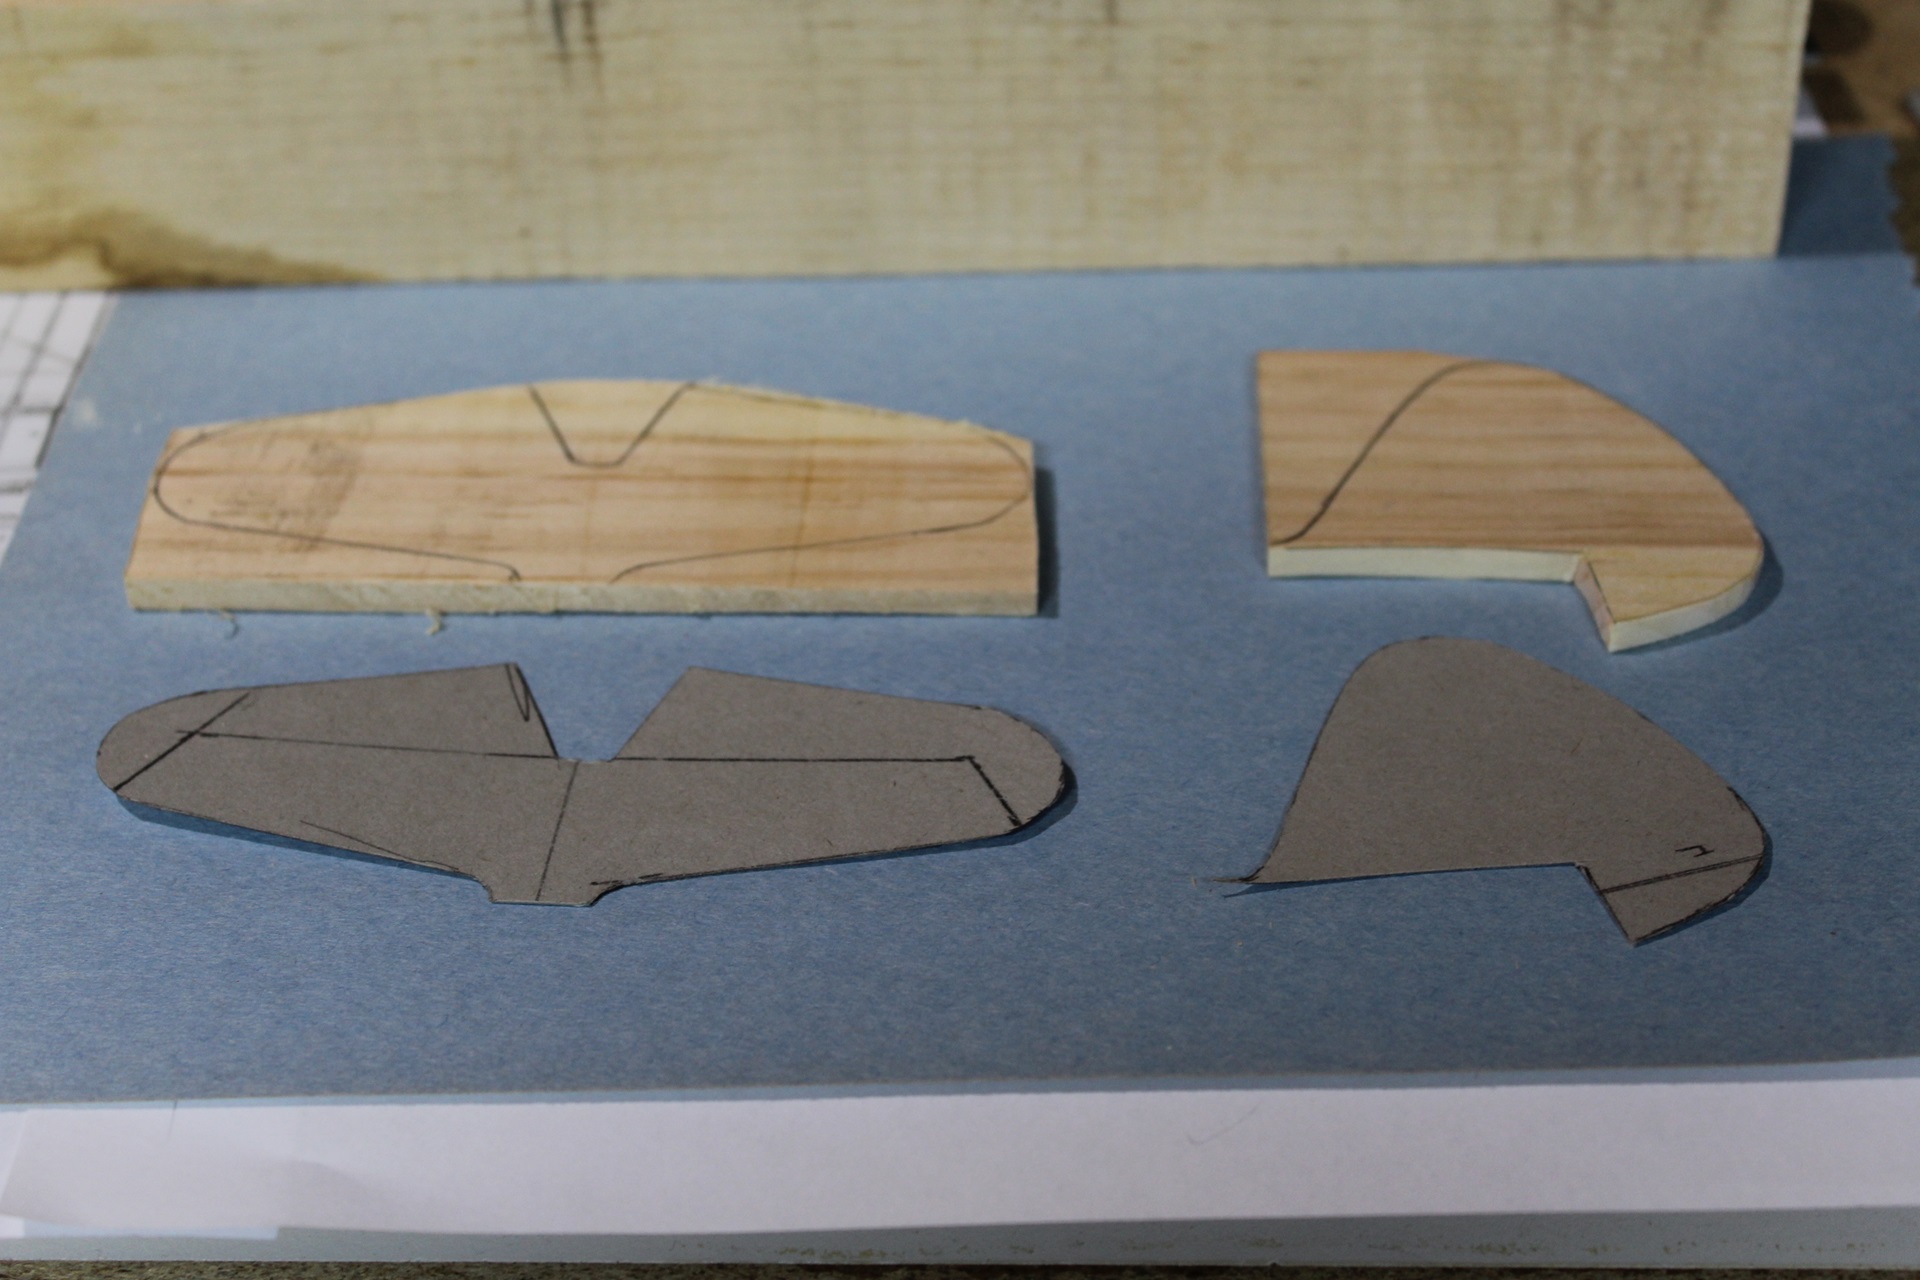
I used carbon paper to trace the top, side and wings on cardboard. These will be used to mark the wood I will select.
Lou
Please bear in mind my audience on Facebook are not modelers.
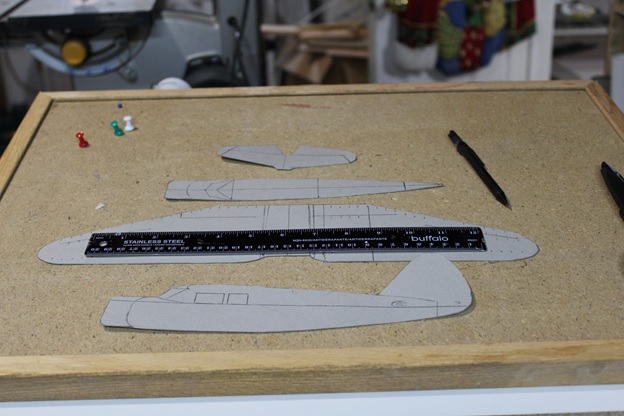
I used carbon paper to trace the top, side and wings on cardboard. These will be used to mark the wood I will select.
Lou
Please bear in mind my audience on Facebook are not modelers.
Title: Re: 1/32 Scale Stinson Gullwing
Post by: lastvautour on May 10, 2017, 05:51:41 PM
Post by: lastvautour on May 10, 2017, 05:51:41 PM
Making a model part three
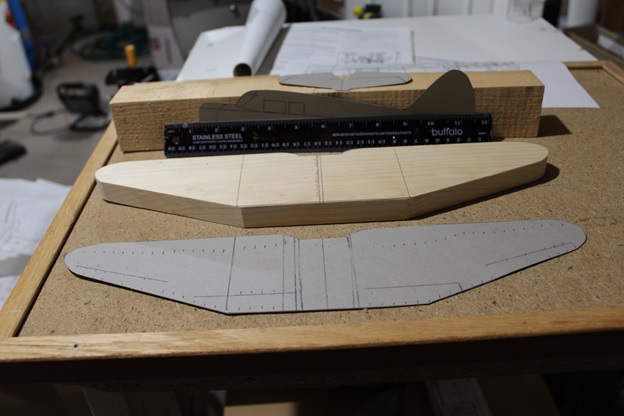
We will start with the wing. Using the cardboard template I drew the shape needed. Using a hand saw, band saw and a belt/disc sander I removed the excess wood from the pattern.
Lou

We will start with the wing. Using the cardboard template I drew the shape needed. Using a hand saw, band saw and a belt/disc sander I removed the excess wood from the pattern.
Lou
Title: Re: 1/32 Scale Stinson Gullwing
Post by: lastvautour on May 11, 2017, 12:50:36 PM
Post by: lastvautour on May 11, 2017, 12:50:36 PM
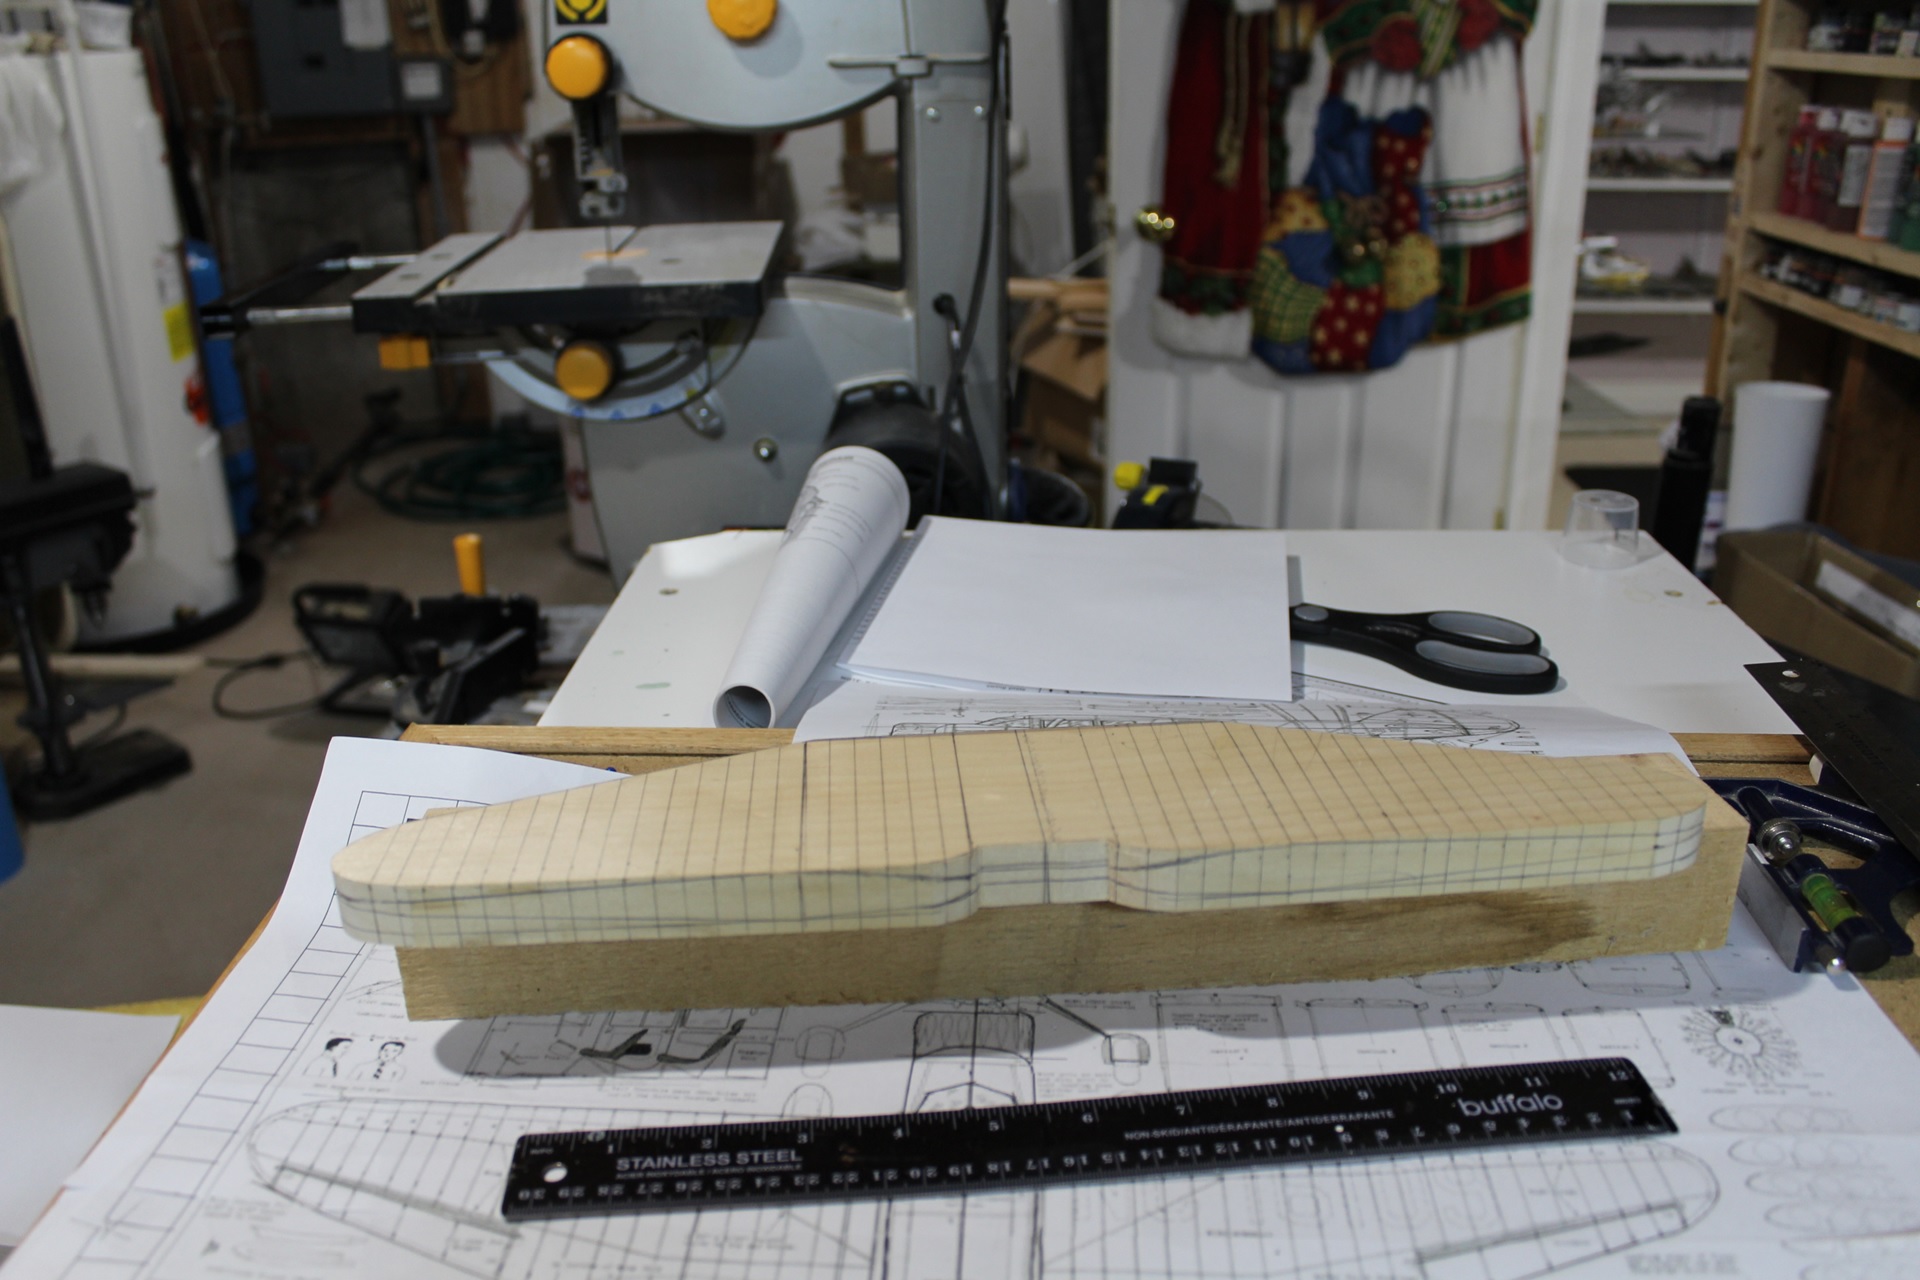
Making a model part four.
Using pencil and ruler and much patience draw the frontal view of the wing on the front and back of the wooden block. The extra lines are reference lines for later. As you carved the wing to the frontal view those lines will be redrawn.
Lou
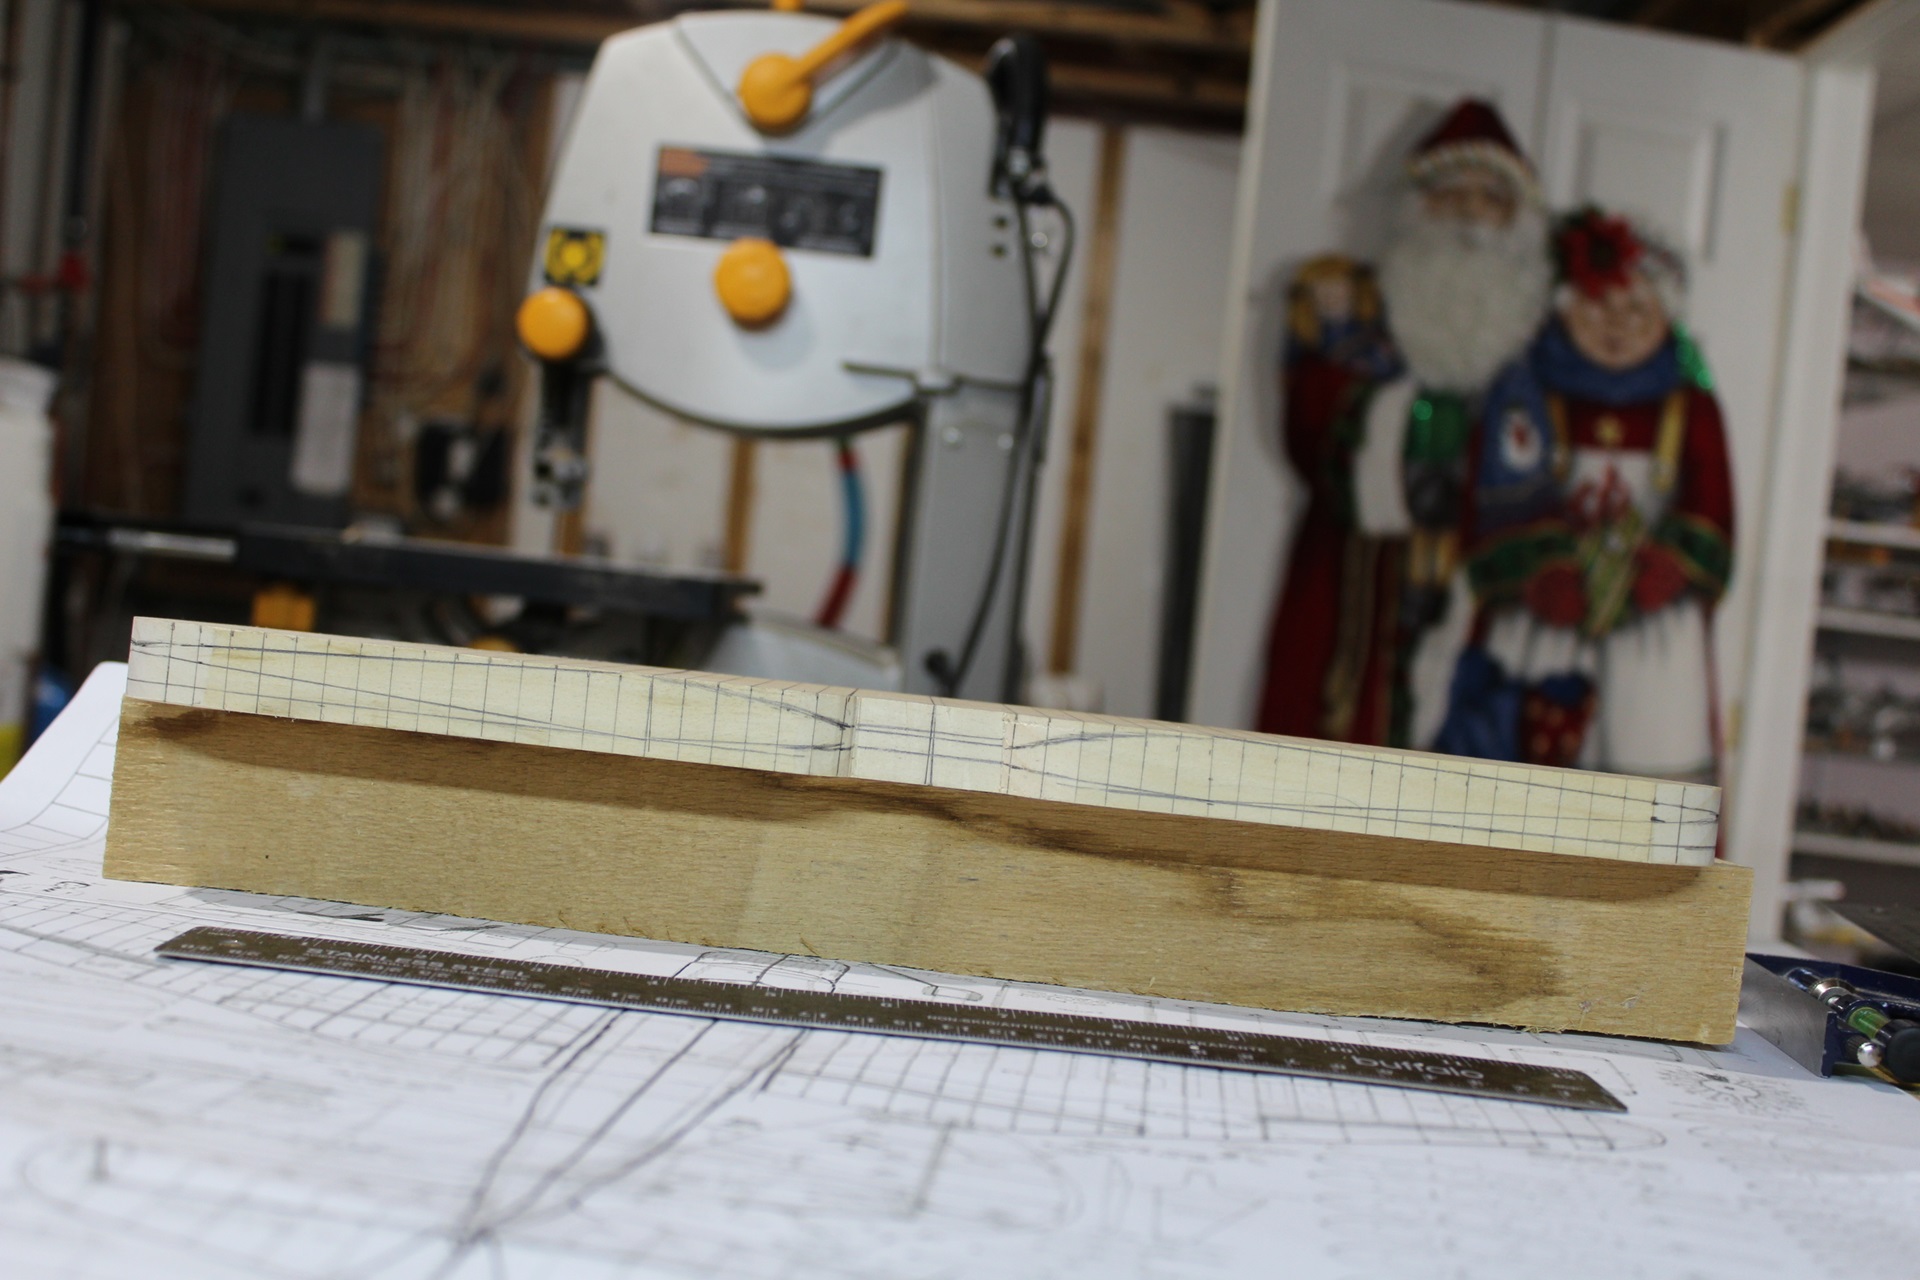
Using pencil and ruler and much patience draw the frontal view of the wing on the front and back of the wooden block. The extra lines are reference lines for later. As you carved the wing to the frontal view those lines will be redrawn.
Lou
Title: Re: 1/32 Scale Stinson Gullwing
Post by: johnnytodd on May 11, 2017, 06:20:41 PM
Post by: johnnytodd on May 11, 2017, 06:20:41 PM
This is great to watch - & learn someone else' technique!
Title: Re: 1/32 Scale Stinson Gullwing
Post by: lastvautour on May 11, 2017, 09:21:58 PM
Post by: lastvautour on May 11, 2017, 09:21:58 PM
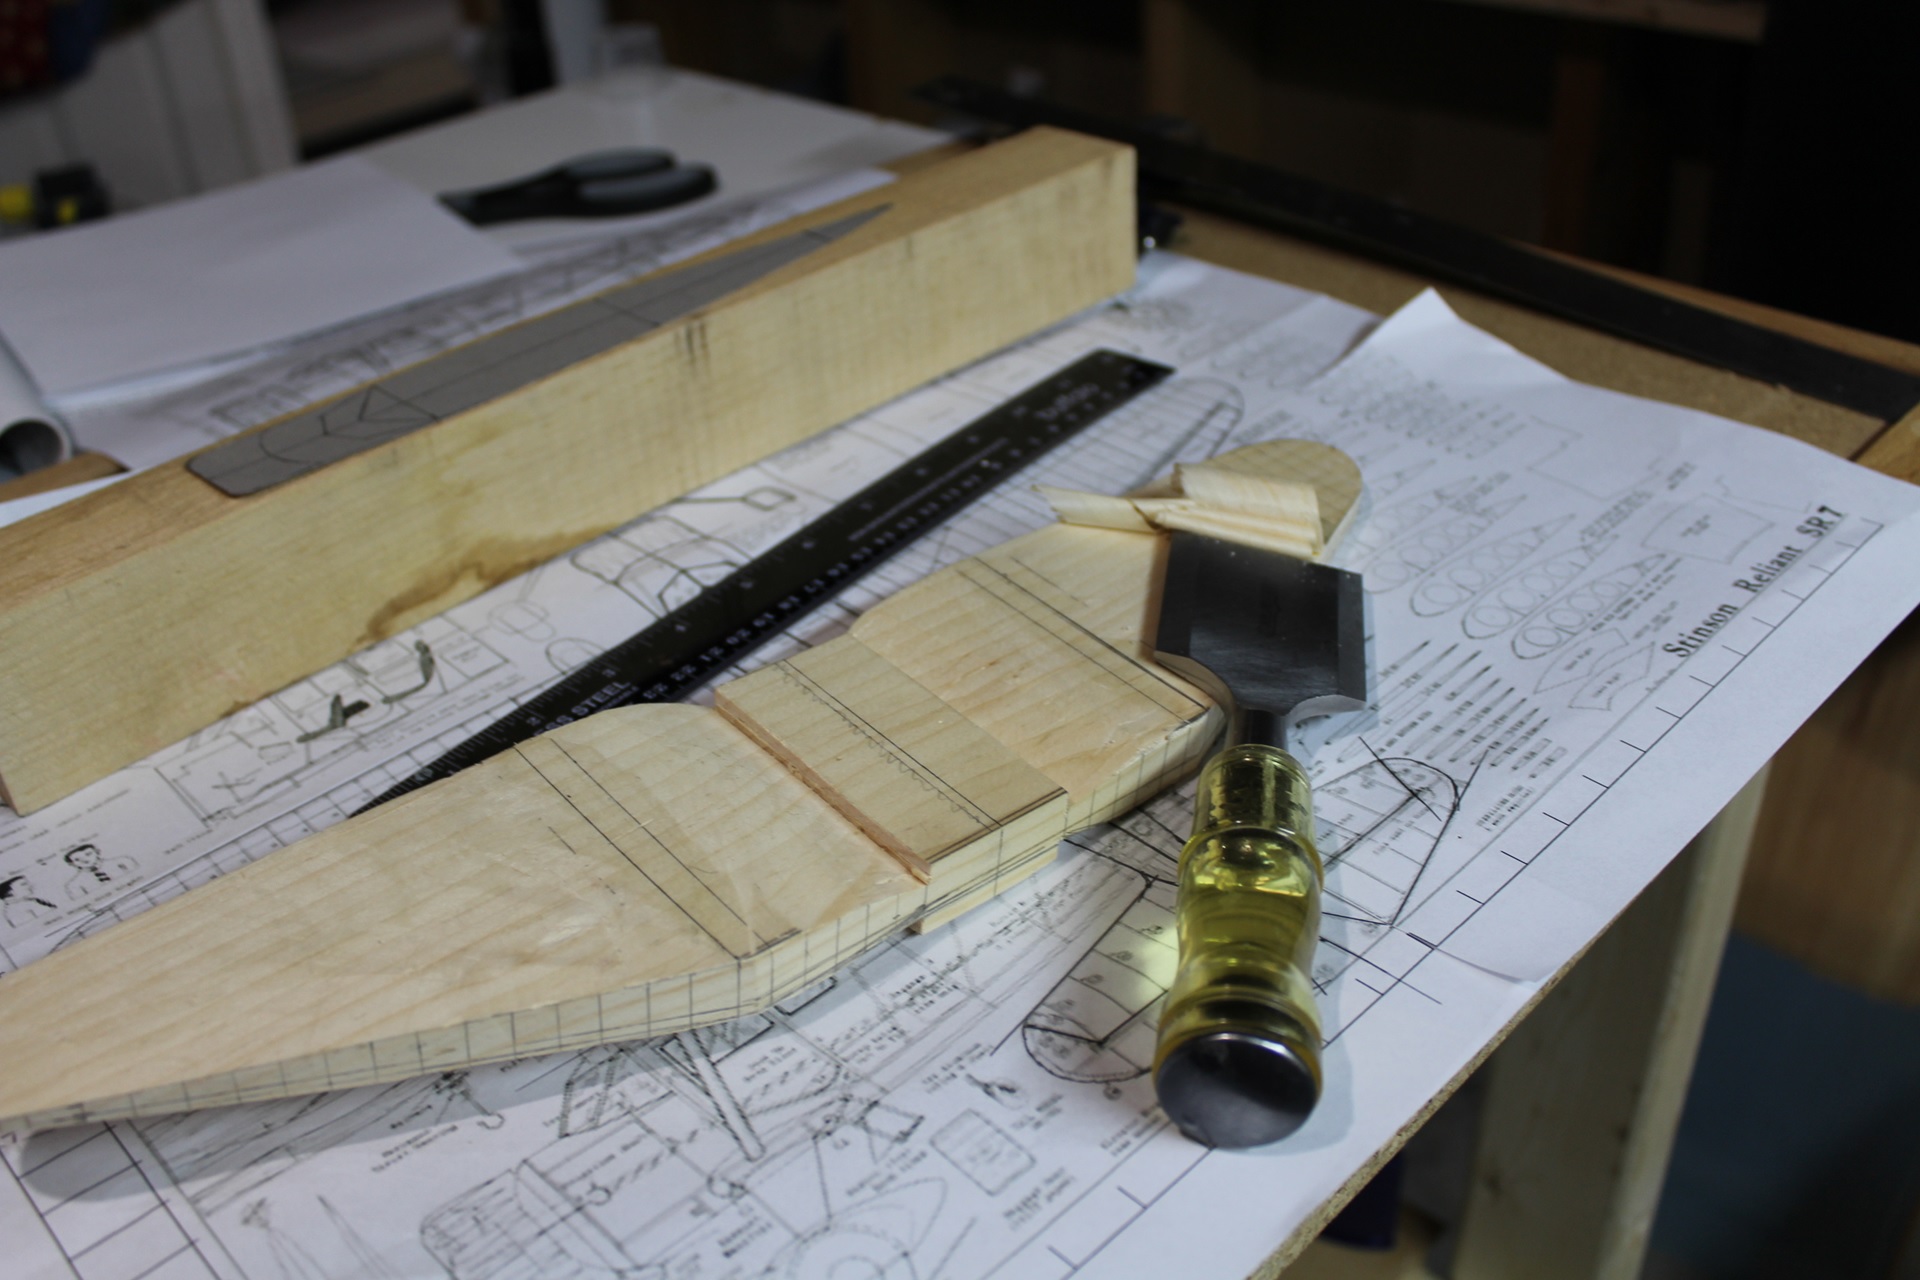
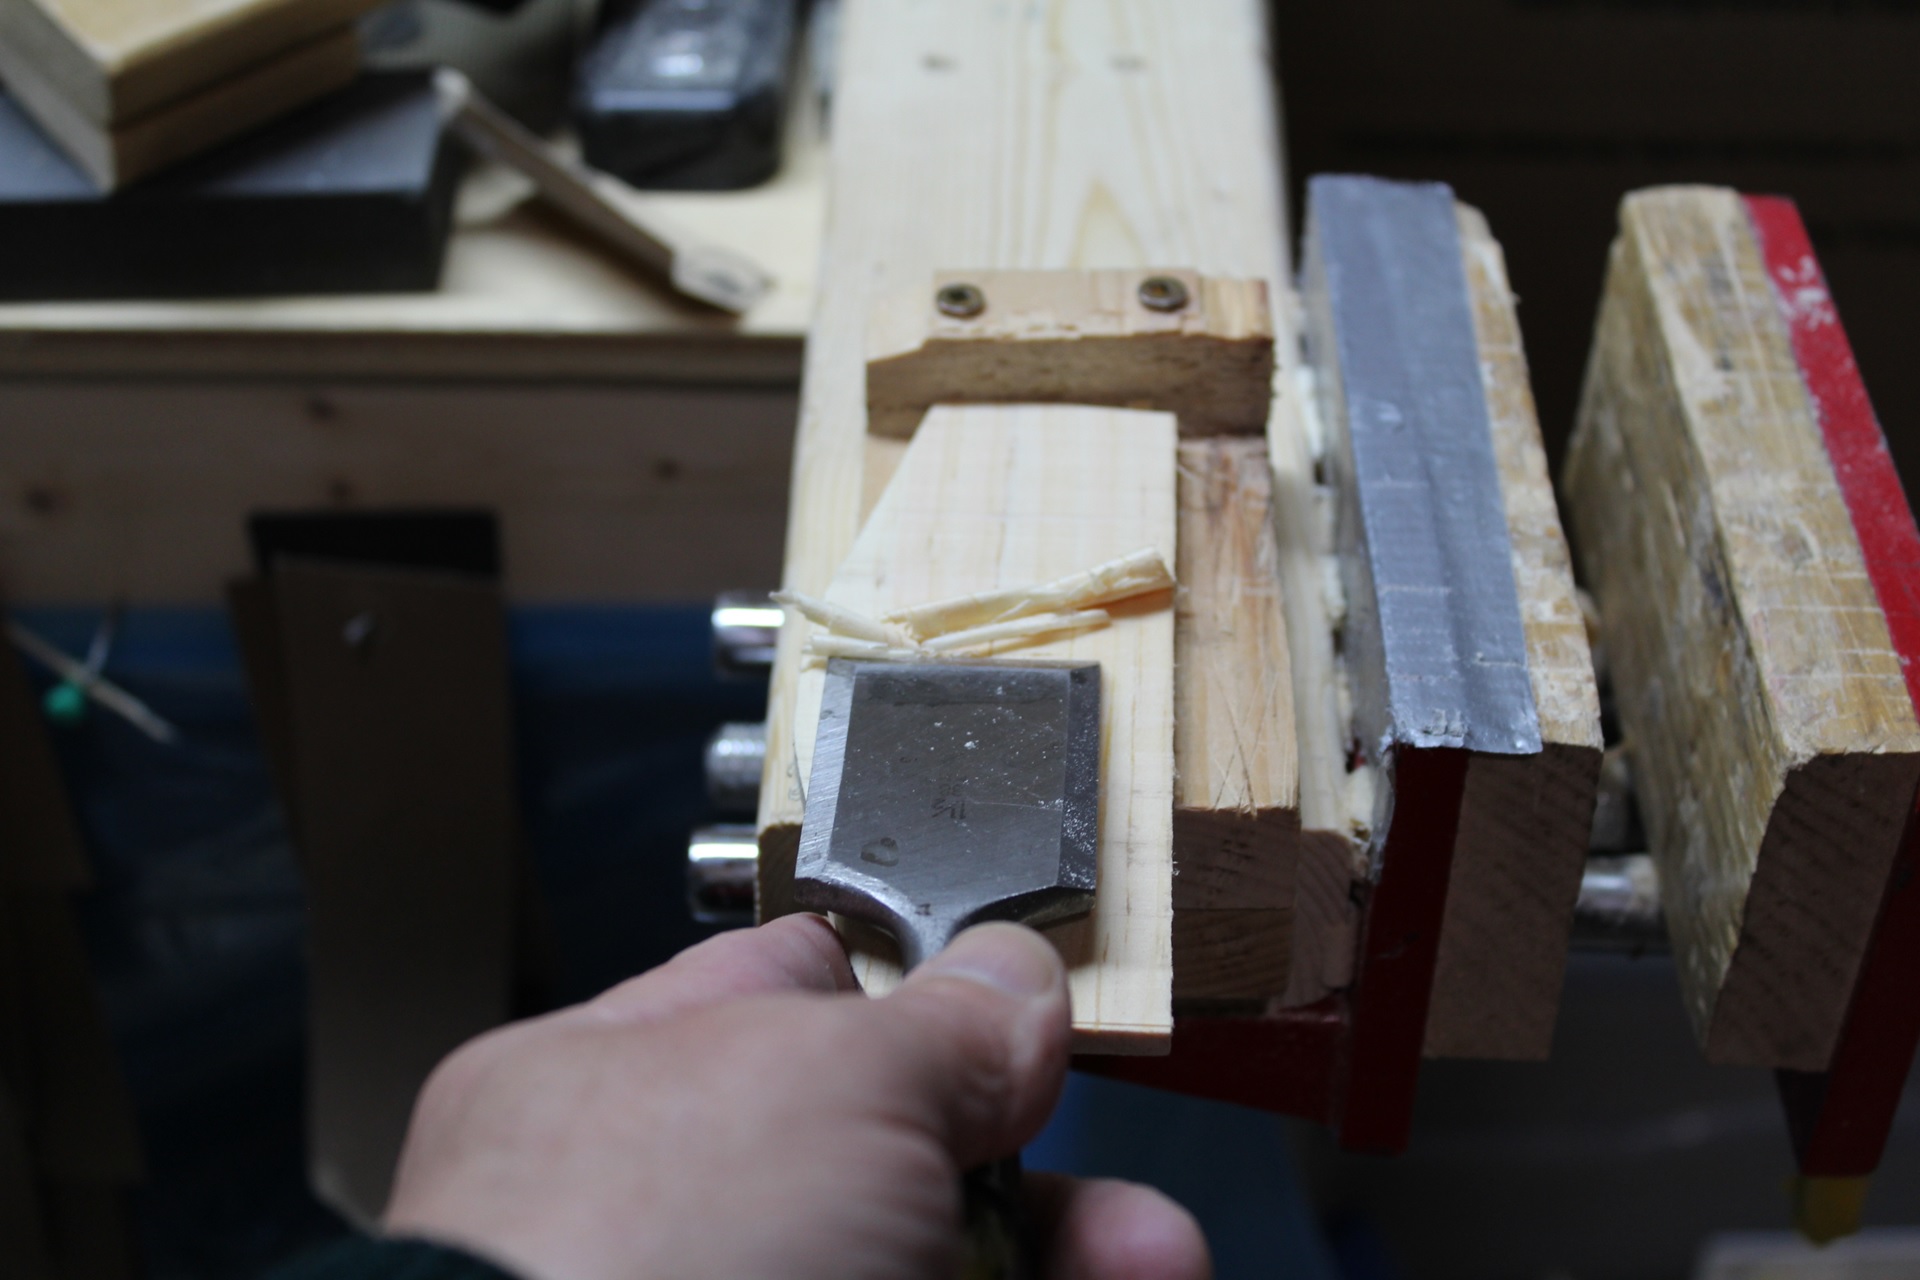
Making a model part five.
Remove the unwanted wood keeping what is inside the drawn lines. I used a 2" chisel and it took about an hour to get the shape I wanted.
Lou
PS John, it does take all different approaches.
Remove the unwanted wood keeping what is inside the drawn lines. I used a 2" chisel and it took about an hour to get the shape I wanted.
Lou
PS John, it does take all different approaches.
Title: Re: 1/32 Scale Stinson Gullwing
Post by: lastvautour on May 11, 2017, 09:23:11 PM
Post by: lastvautour on May 11, 2017, 09:23:11 PM
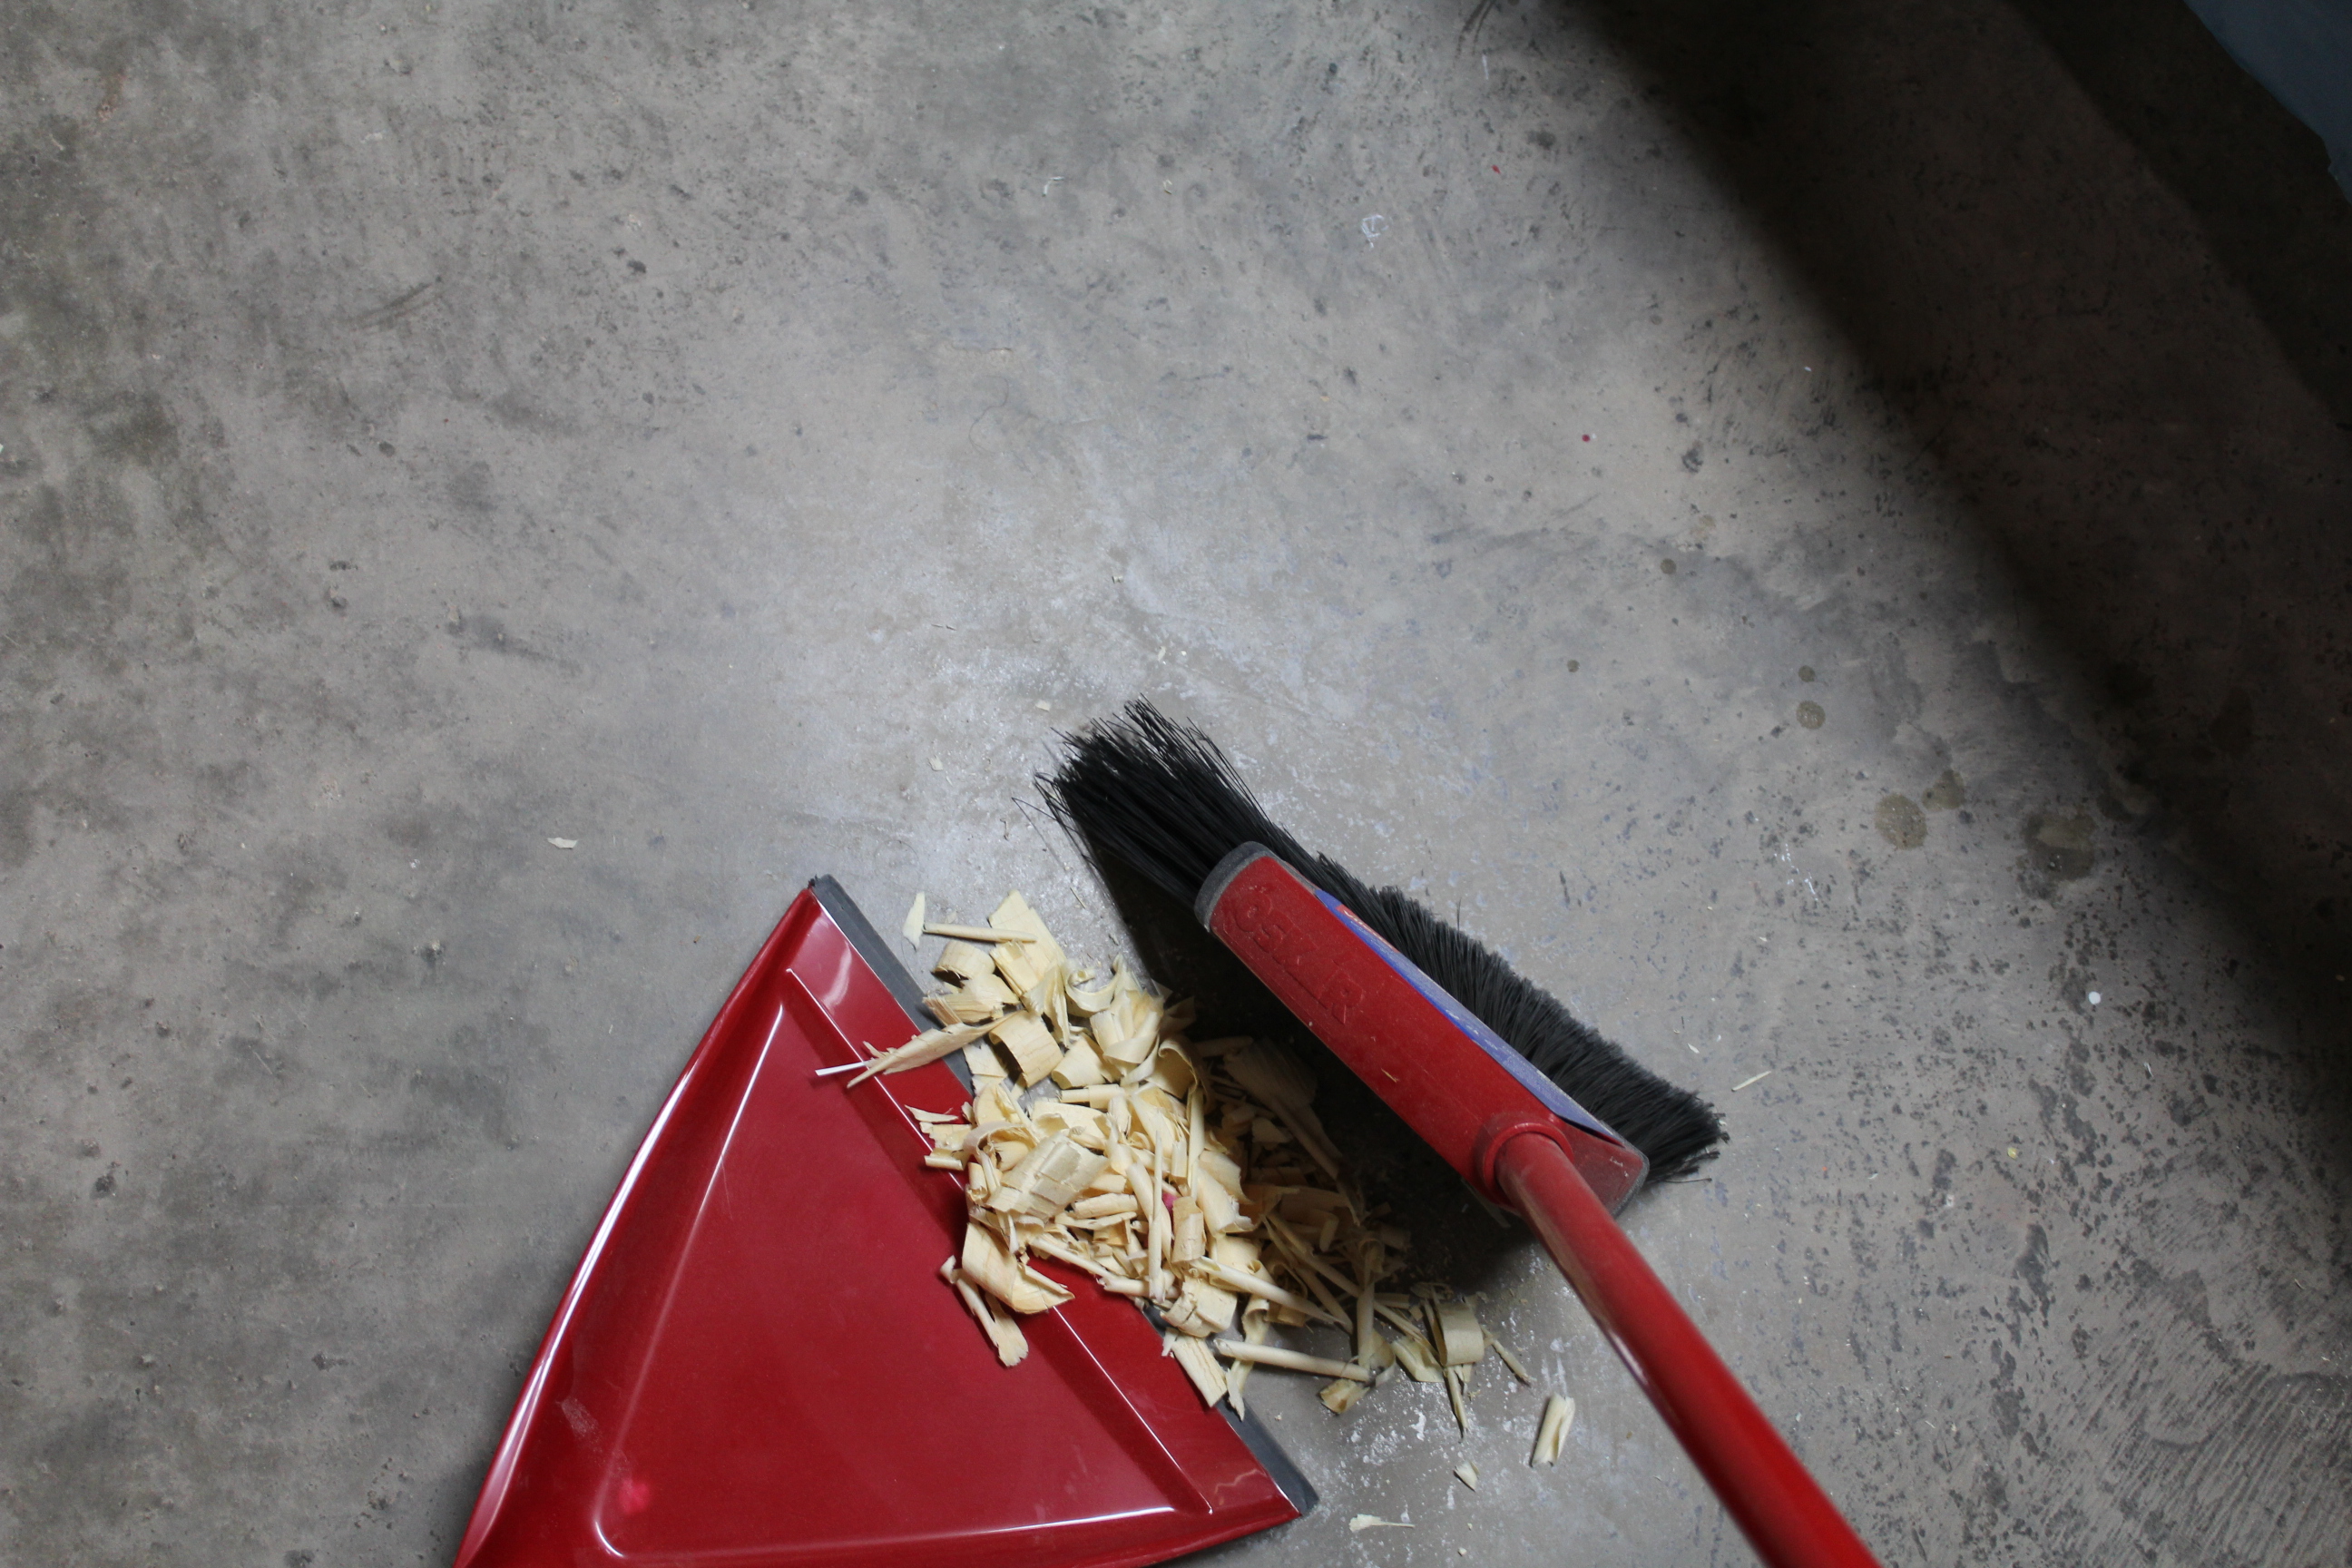
AND THE MOST IMPORTANT PART OF ANY PROJECT IS!!!!
Lou
Lou
Title: Re: 1/32 Scale Stinson Gullwing
Post by: lastvautour on May 12, 2017, 02:36:24 PM
Post by: lastvautour on May 12, 2017, 02:36:24 PM
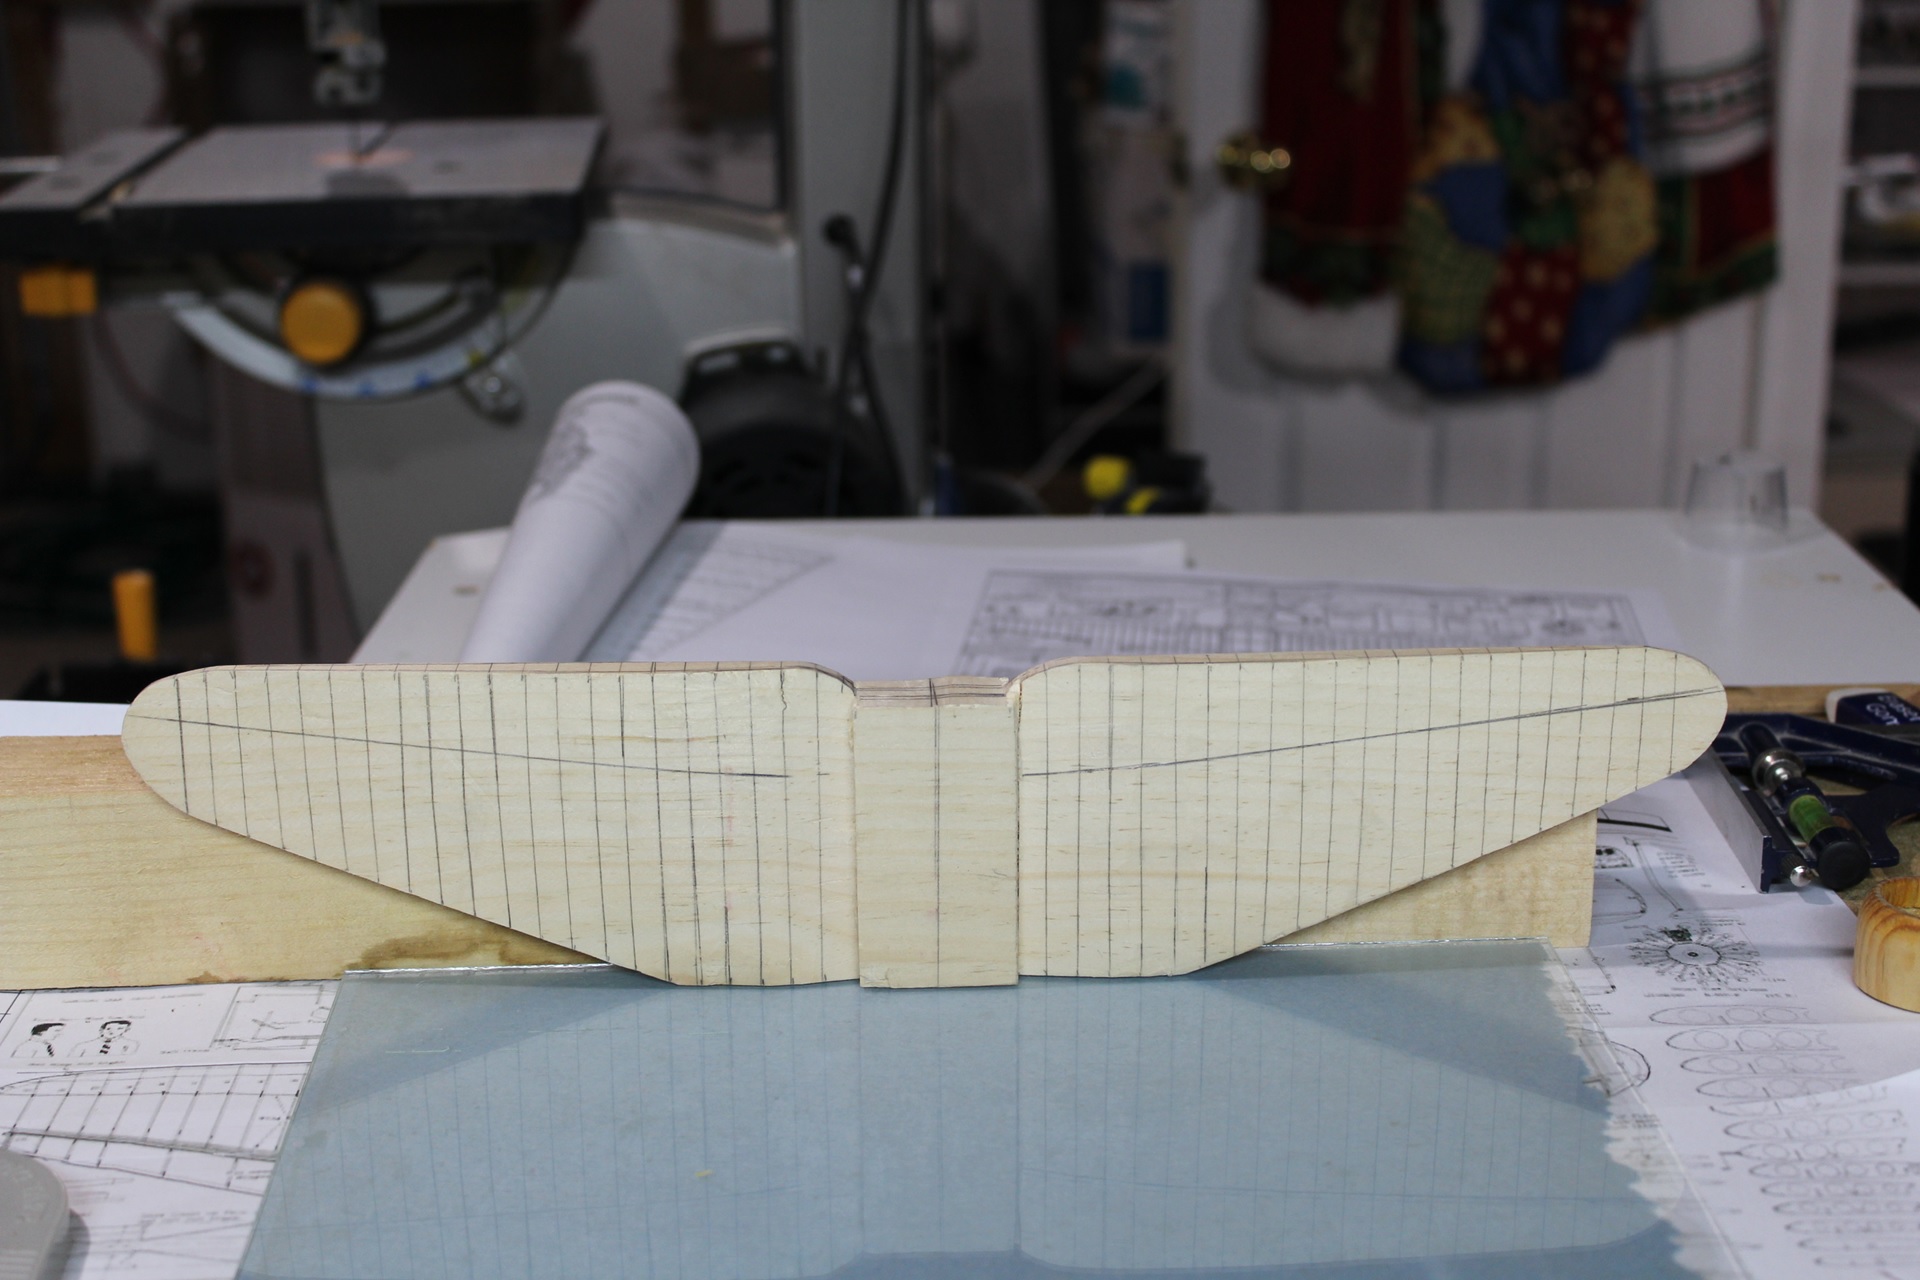
Making a model part six.
Lines are replaced after carving and new lines added.
1. This is the thickest part of the wing airfoil and is located 1/3 from the leading edge.
2. This is the leading edge of the wing
3. The airfoil shape is as depicted in the drawings
4. This is the trailing edge of the wing.
The leading edge will be rounded while the trailing edge will be tapered.
Lou
Title: Re: 1/32 Scale Stinson Gullwing
Post by: lastvautour on May 14, 2017, 06:35:20 PM
Post by: lastvautour on May 14, 2017, 06:35:20 PM
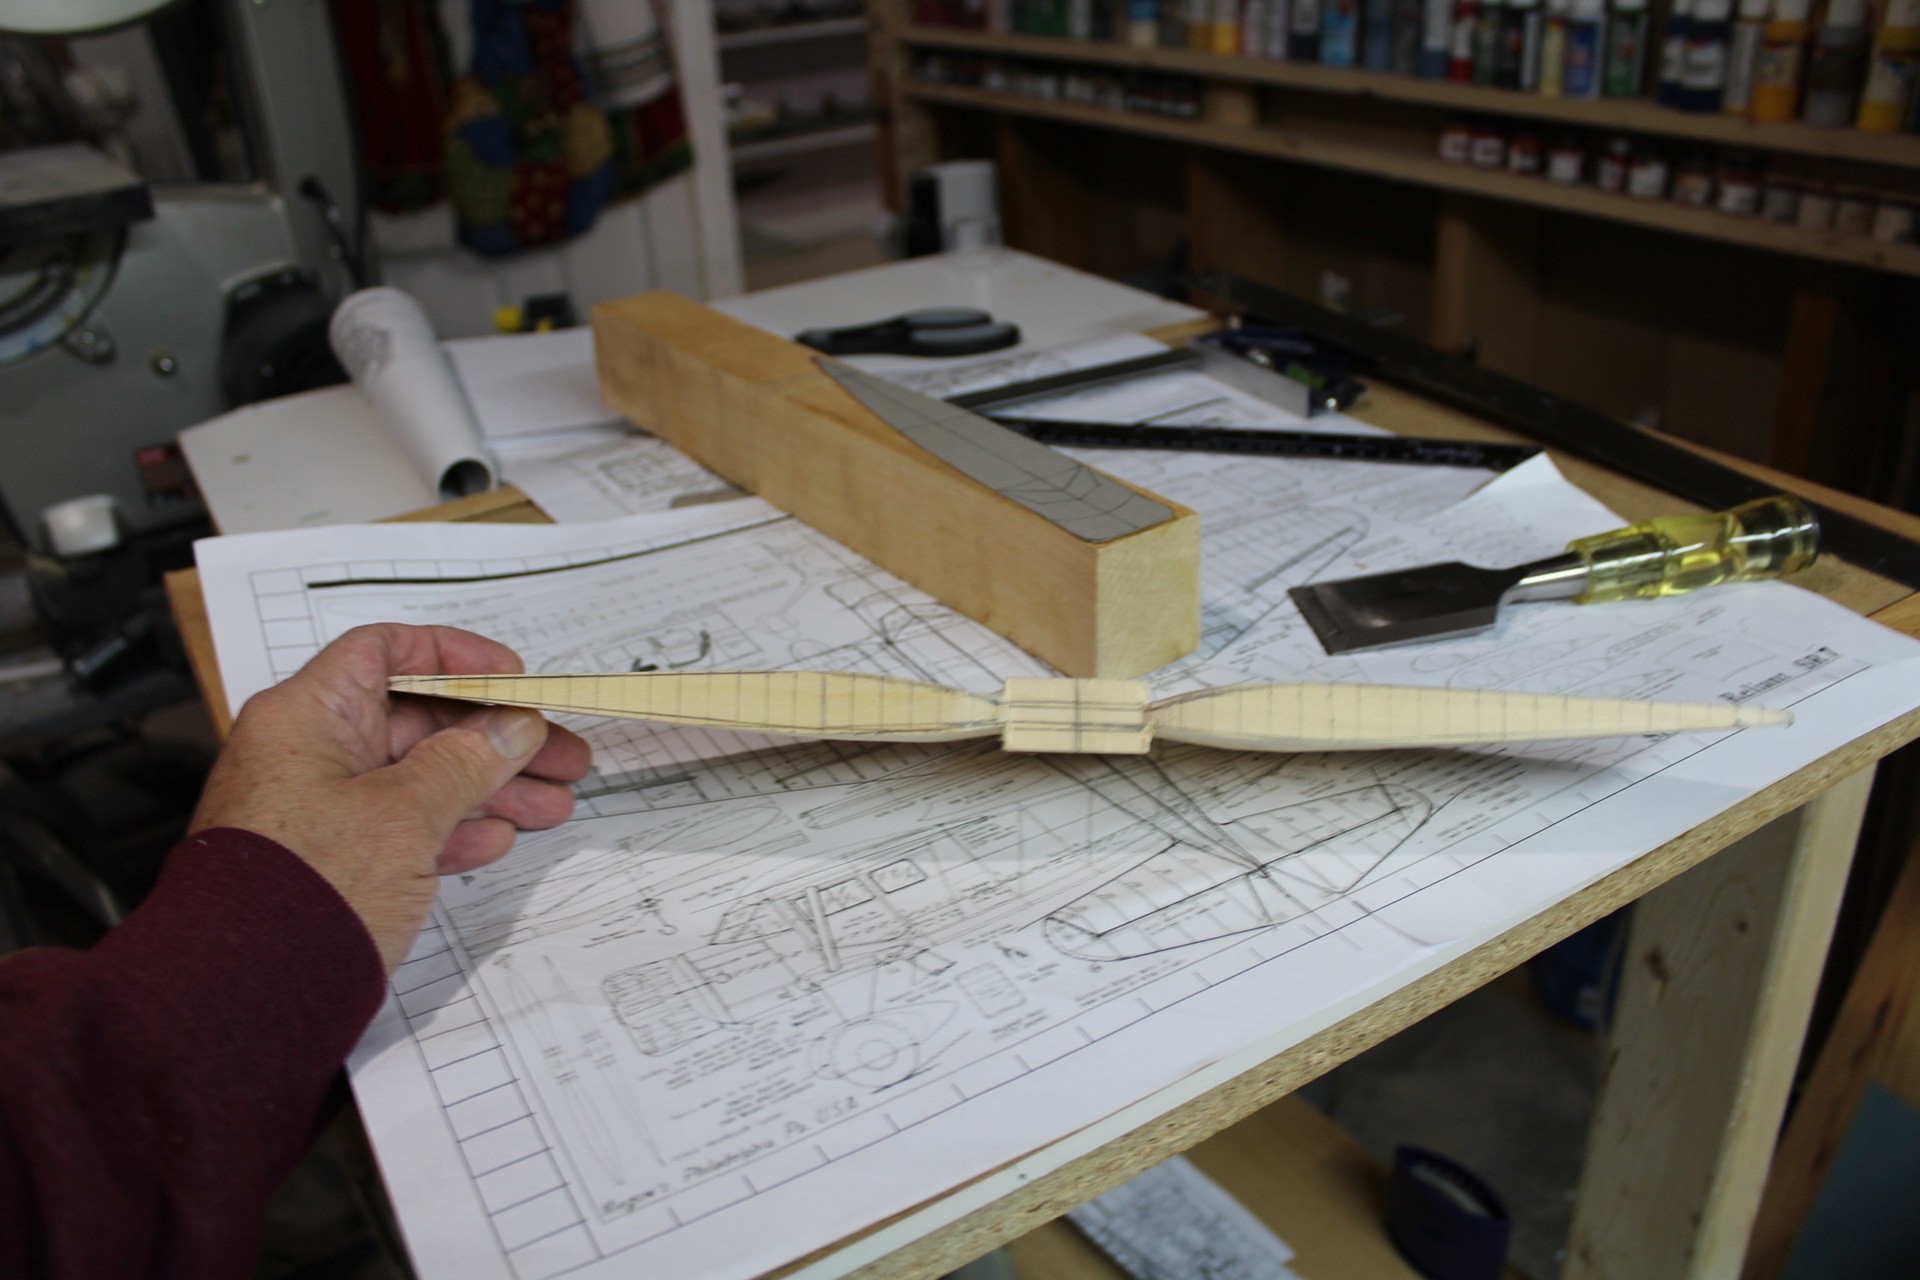
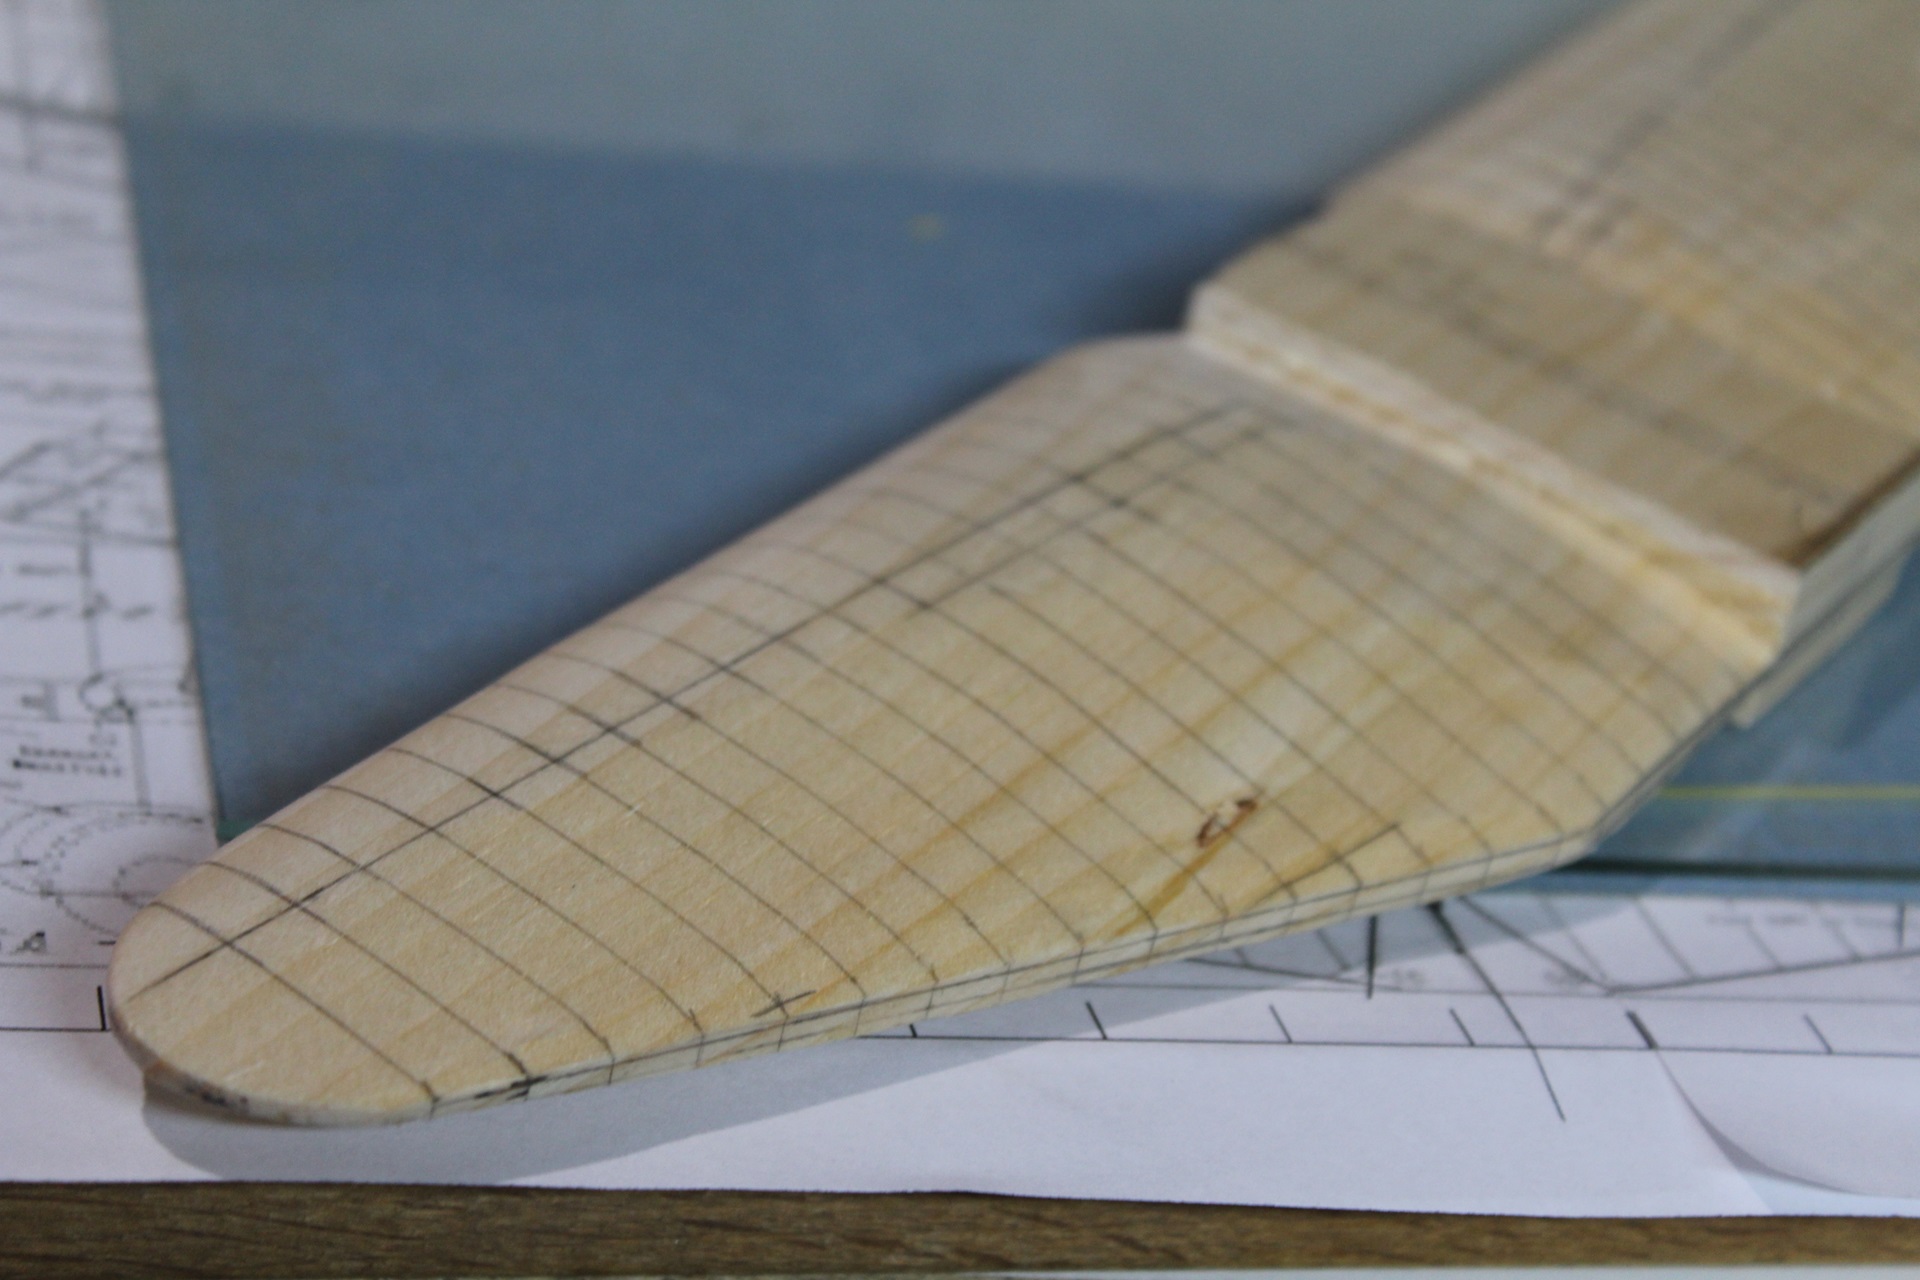
Making a model part seven.
The first two photos show the bottom of the wing that is not carved to shape. The next two show the carved top wing from the same angles. Redoing the lines allows you to see the curvature of the wing when tilted.
Lou


The first two photos show the bottom of the wing that is not carved to shape. The next two show the carved top wing from the same angles. Redoing the lines allows you to see the curvature of the wing when tilted.
Lou
Title: Re: 1/32 Scale Stinson Gullwing
Post by: lastvautour on May 14, 2017, 06:37:47 PM
Post by: lastvautour on May 14, 2017, 06:37:47 PM
Making a model part seven.
I added a two more photos on Facebook for clarity.
Lou

I added a two more photos on Facebook for clarity.
Lou
Title: Re: 1/32 Scale Stinson Gullwing
Post by: lastvautour on May 15, 2017, 01:44:30 PM
Post by: lastvautour on May 15, 2017, 01:44:30 PM
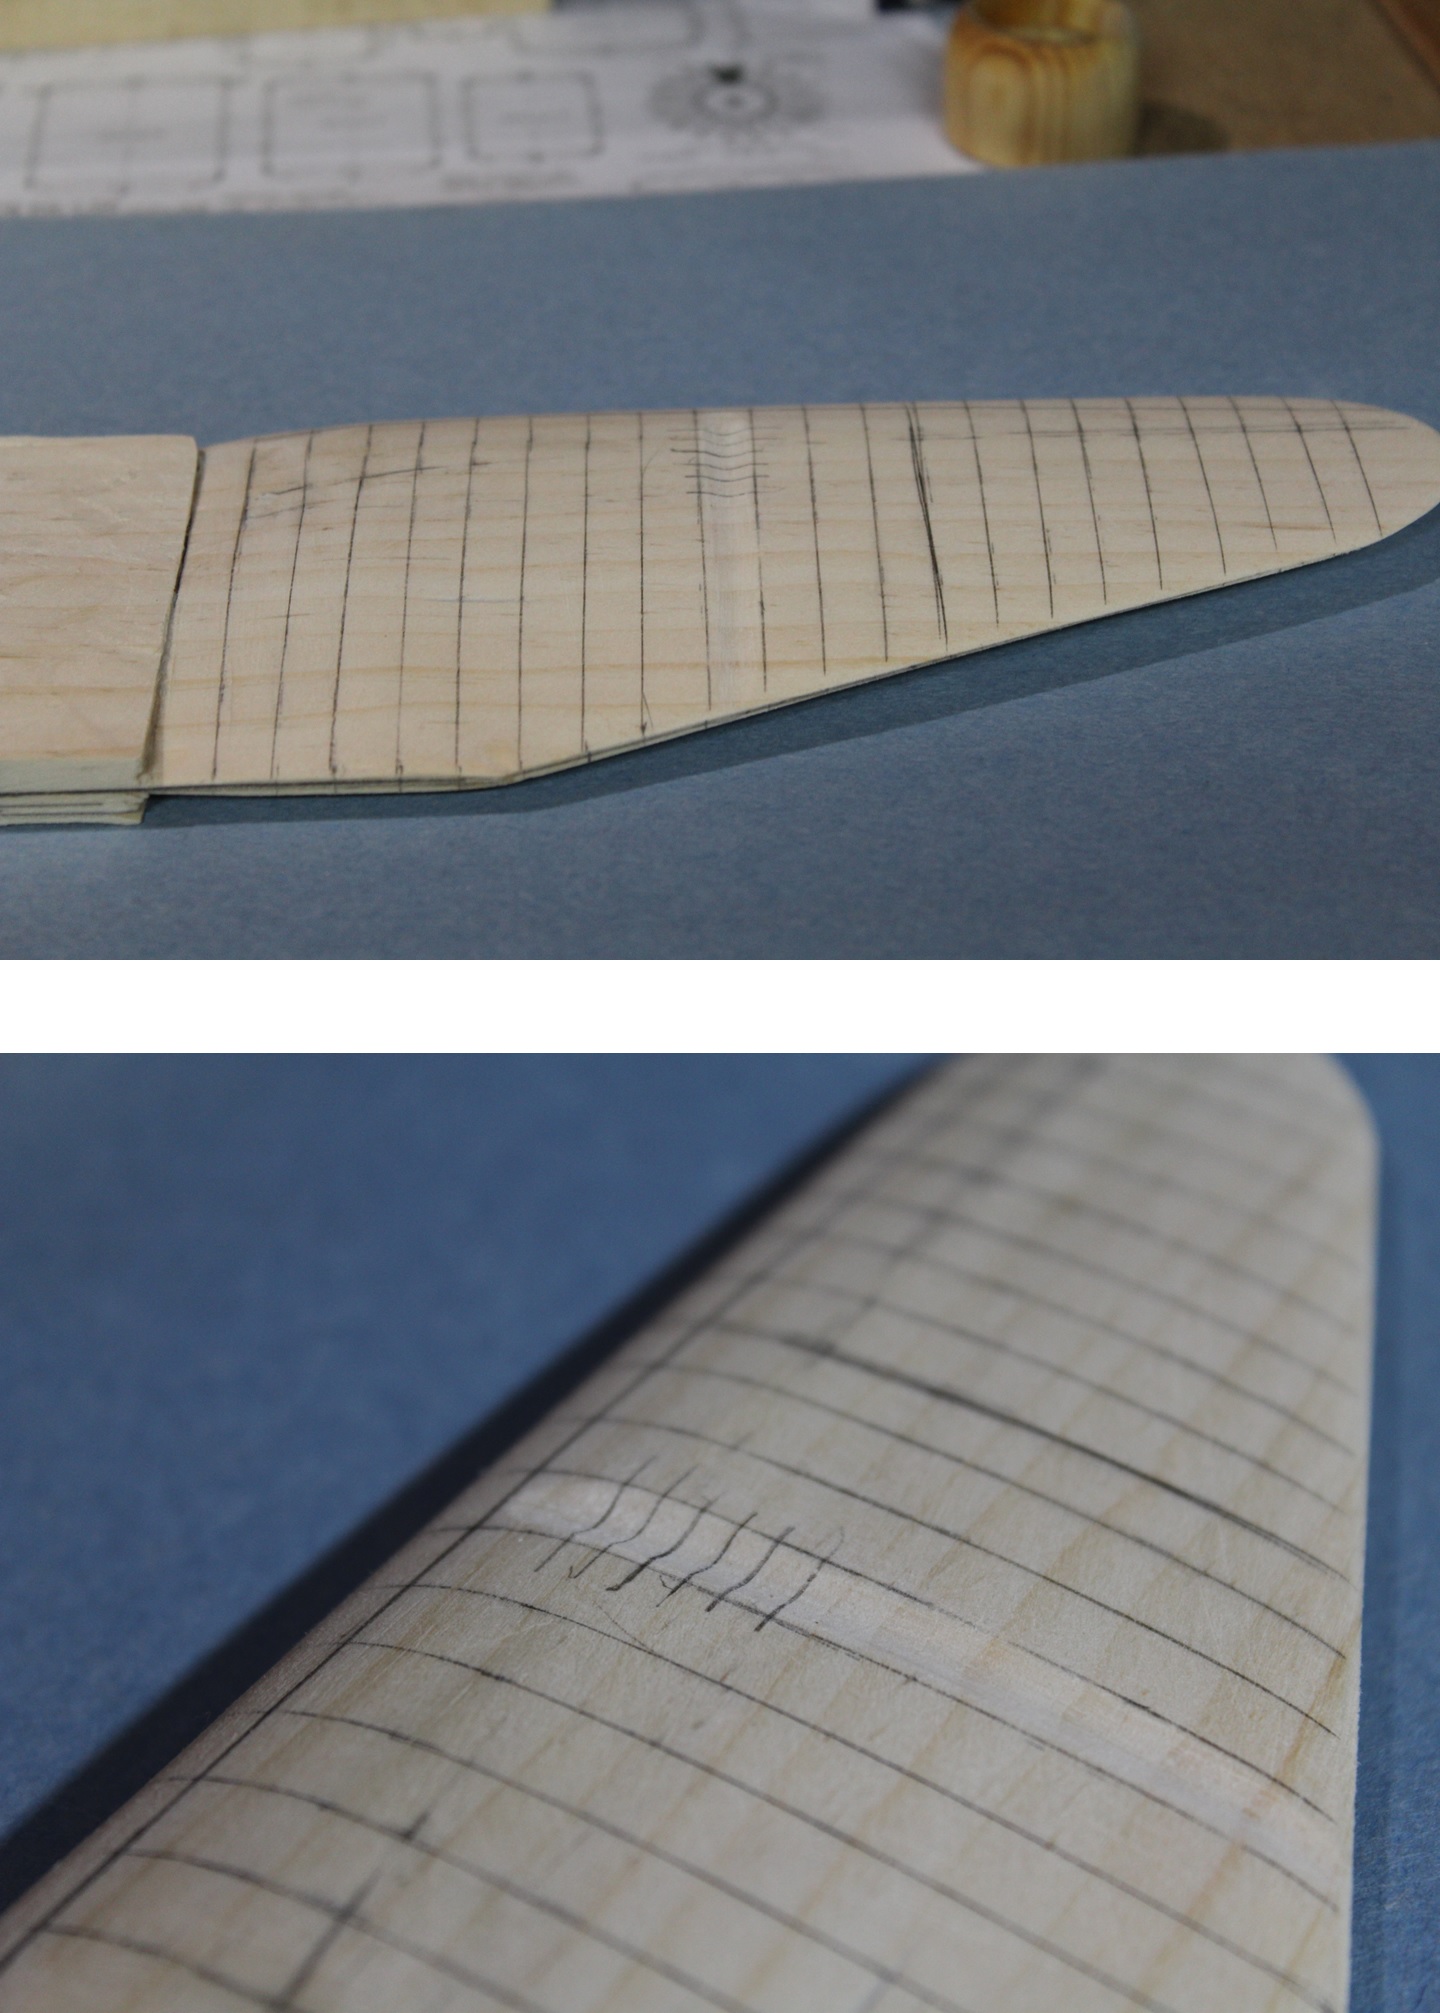
Making a model part eight.
After doing some sanding to smooth things out, sandpaper rolled in a dowel will sand between the lines. These wings were built with metal ribs covered in fabric. The stretching caused the fabric to sag between the ribs (lines).
Lou
After doing some sanding to smooth things out, sandpaper rolled in a dowel will sand between the lines. These wings were built with metal ribs covered in fabric. The stretching caused the fabric to sag between the ribs (lines).
Lou
Title: Re: 1/32 Scale Stinson Gullwing
Post by: lastvautour on May 16, 2017, 10:37:48 PM
Post by: lastvautour on May 16, 2017, 10:37:48 PM
Making a model part nine.
Sanding of the rib pattern on the wing takes about two minutes per bay and the wing has 42 top and 42 bottom bays. To take a break from sanding I started the tail feathers. The wood started off as a 1" board cut down to 1/4" on my band saw. Before owning a band saw, I would hold a handsaw between my legs and work the piece of wood back and forth to cut it to size. Once the wood is cut I used a chisel to bring it down to the desired thickness.
Lou
Title: Re: 1/32 Scale Stinson Gullwing
Post by: lastvautour on May 21, 2017, 06:35:33 PM
Post by: lastvautour on May 21, 2017, 06:35:33 PM
Making a model part ten.
The fuselage wood has been cut to block form. The block will now be thinned and shaped.
Lou
The fuselage wood has been cut to block form. The block will now be thinned and shaped.
Lou
Title: Re: 1/32 Scale Stinson Gullwing
Post by: lastvautour on May 22, 2017, 09:45:26 PM
Post by: lastvautour on May 22, 2017, 09:45:26 PM
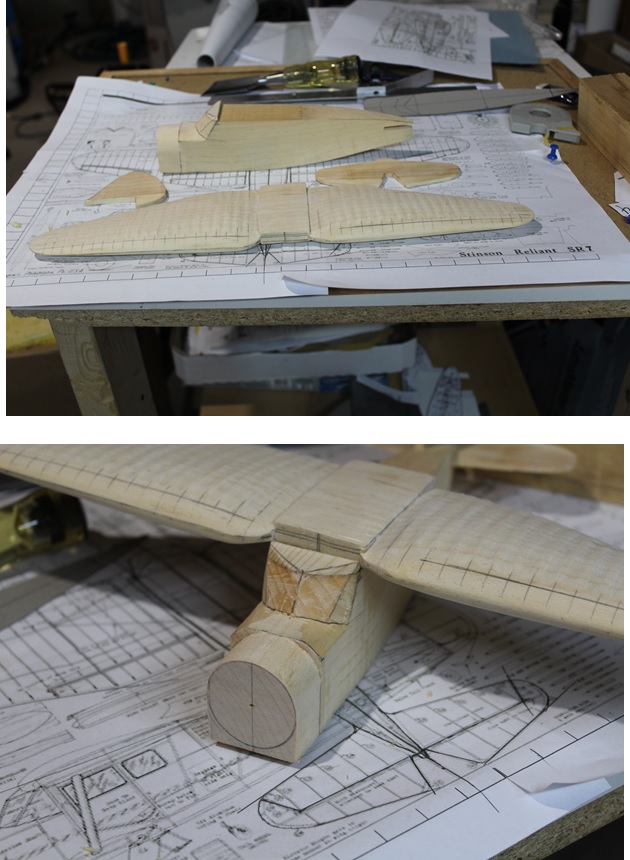
Making a model part 11.
A few joyful minutes spent shaping the fuselage and some detail on the nose area.
Lou
A few joyful minutes spent shaping the fuselage and some detail on the nose area.
Lou
Title: Re: 1/32 Scale Stinson Gullwing
Post by: lastvautour on May 23, 2017, 02:07:41 PM
Post by: lastvautour on May 23, 2017, 02:07:41 PM
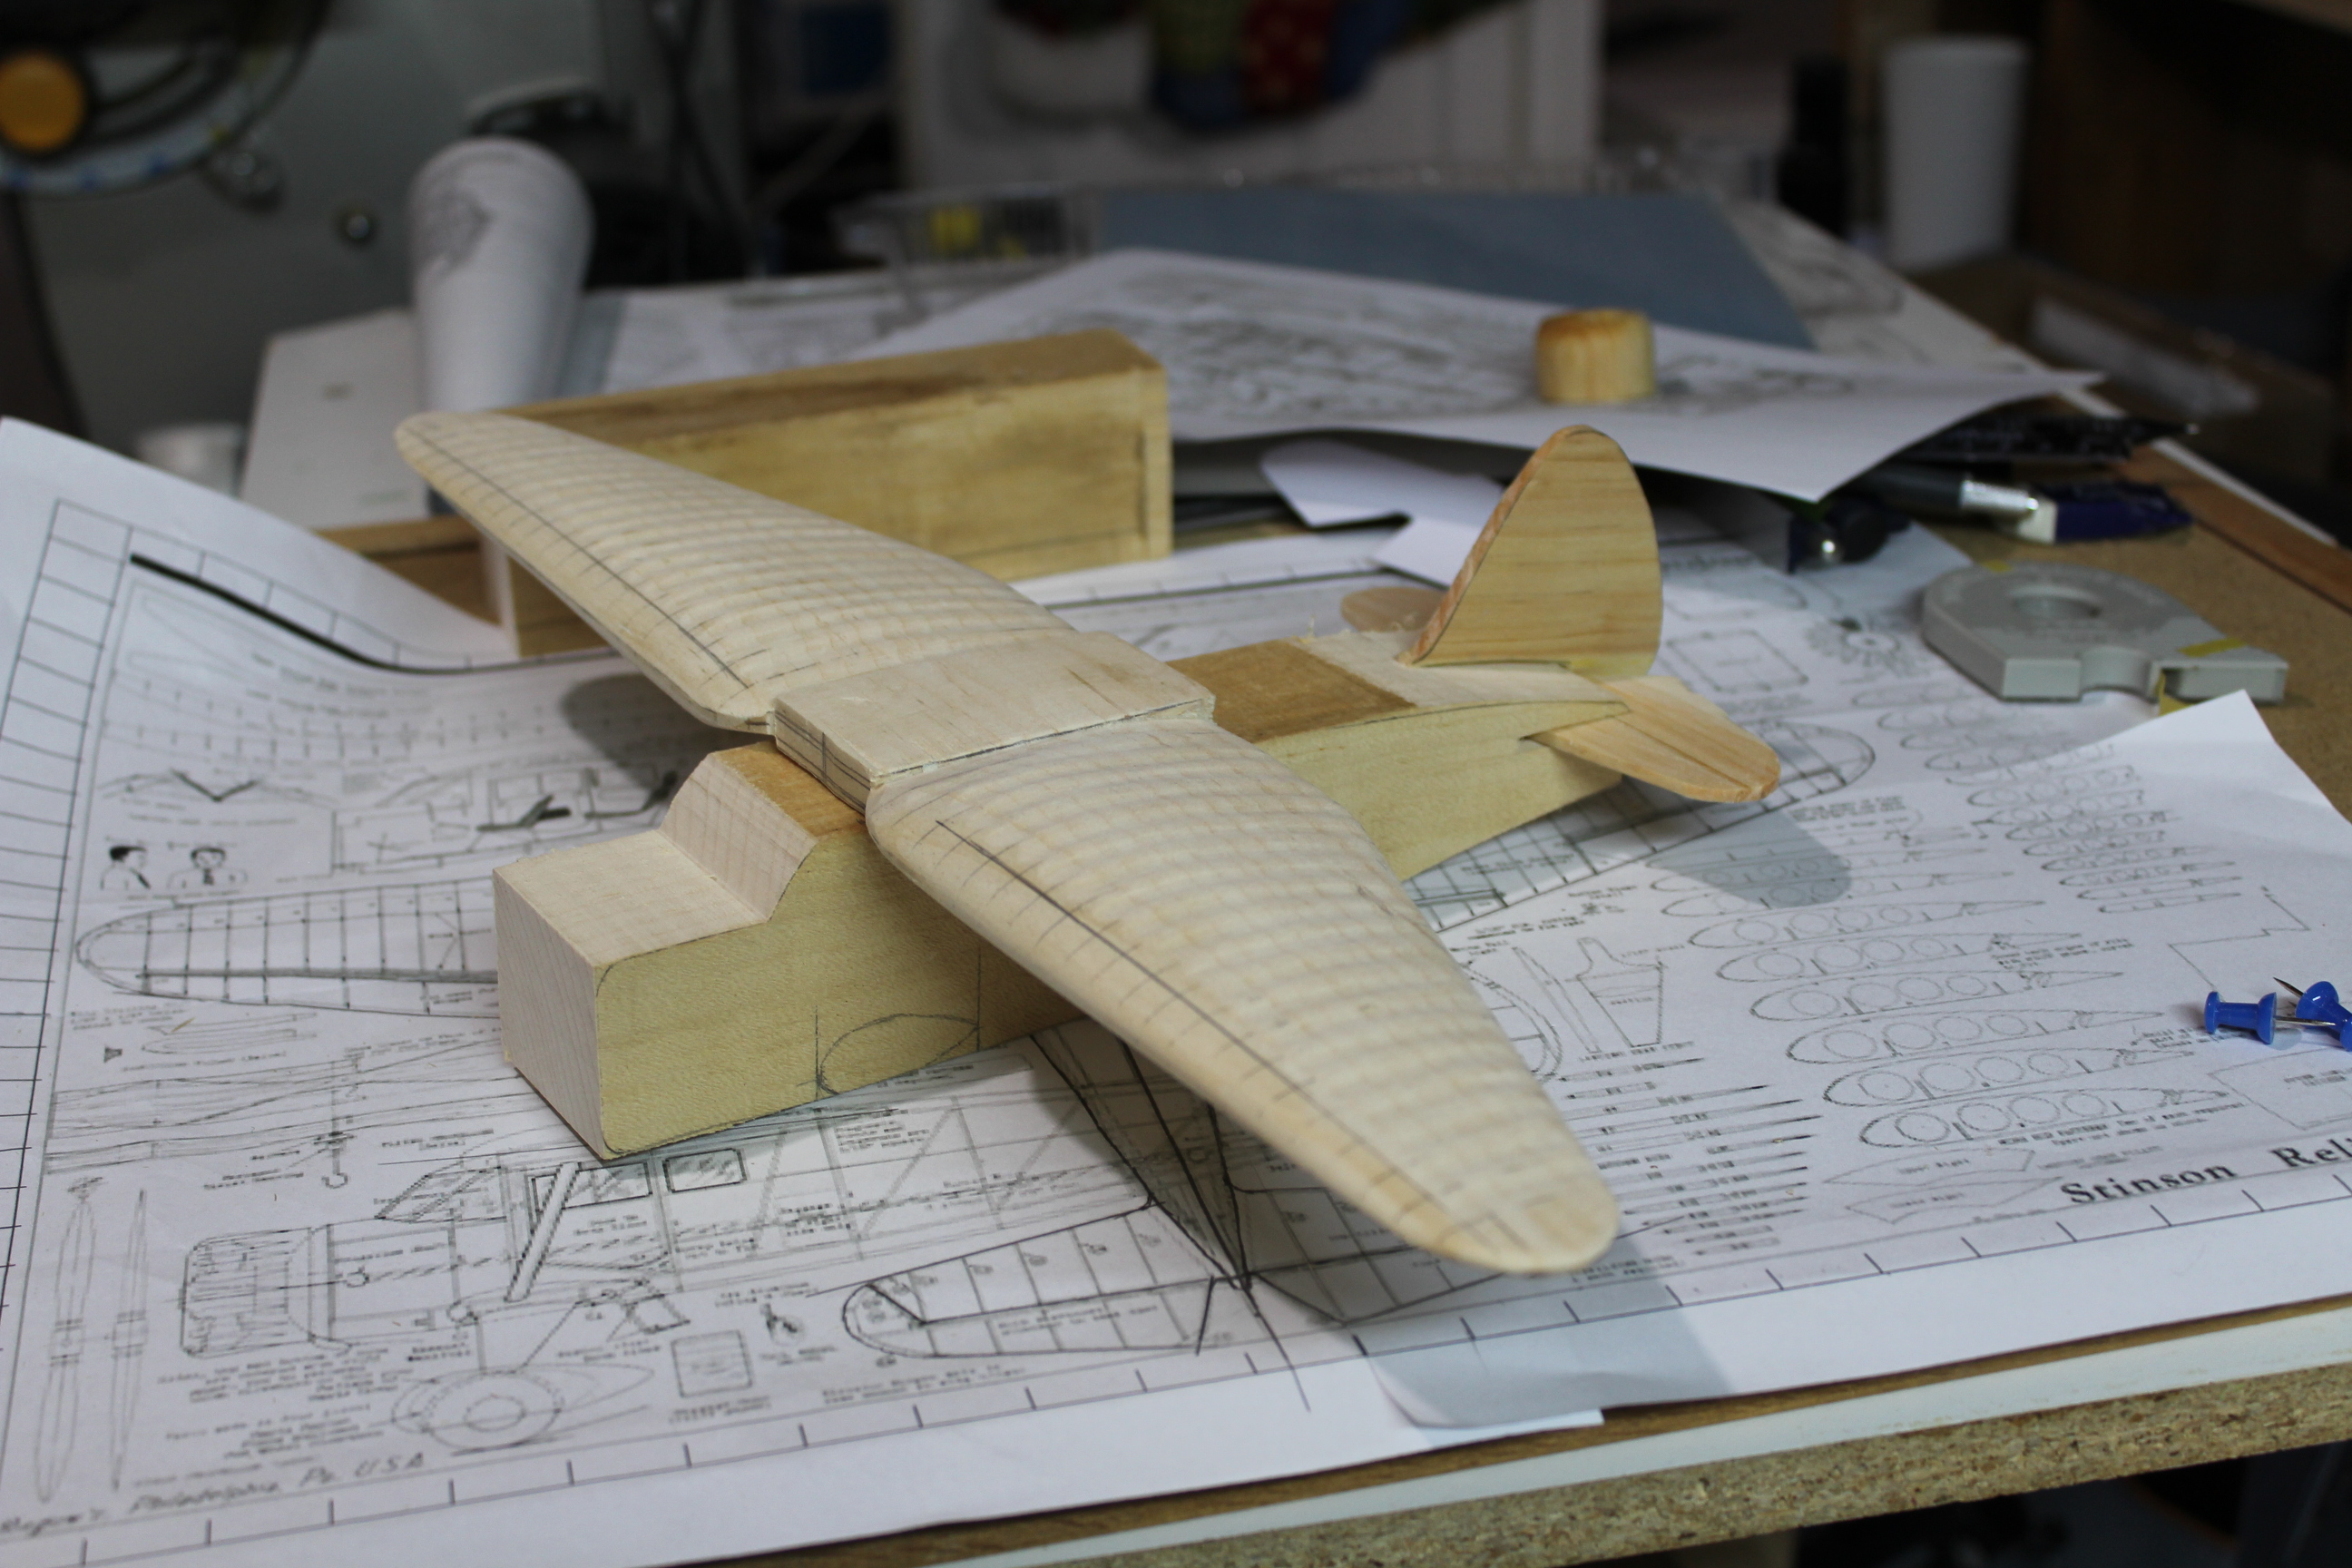
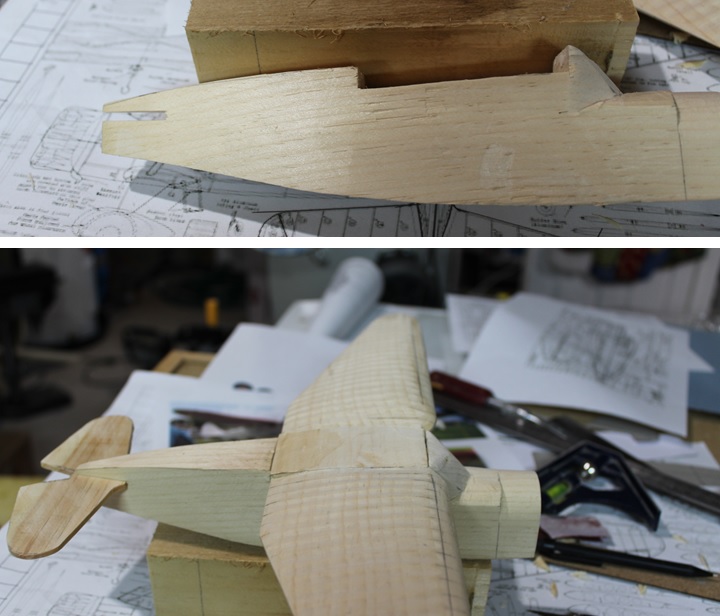
Making a model part 12.
The fuselage is notched to accept the main wing and tail wing.
Lou
The fuselage is notched to accept the main wing and tail wing.
Lou
Title: Re: 1/32 Scale Stinson Gullwing
Post by: buccfan on May 24, 2017, 08:31:43 PM
Post by: buccfan on May 24, 2017, 08:31:43 PM
Excellent progress and tutorial as usual Lou. Regards Paul J.
Title: Re: 1/32 Scale Stinson Gullwing
Post by: lastvautour on May 24, 2017, 09:03:29 PM
Post by: lastvautour on May 24, 2017, 09:03:29 PM
Thank you Paul. My sister recommended I make it on Facebook.
Lou
Lou
Title: Re: 1/32 Scale Stinson Gullwing
Post by: lastvautour on May 27, 2017, 10:14:22 PM
Post by: lastvautour on May 27, 2017, 10:14:22 PM
Making a model part 13.
Detailing of the engine cowling included shaping and adding the rocker arm cover fairings. All eighteen were cut and shaped and then glued in place. Some final sanding will occur later in the project.
Lou

Detailing of the engine cowling included shaping and adding the rocker arm cover fairings. All eighteen were cut and shaped and then glued in place. Some final sanding will occur later in the project.
Lou
Title: Re: 1/32 Scale Stinson Gullwing
Post by: johnnytodd on May 28, 2017, 09:47:34 PM
Post by: johnnytodd on May 28, 2017, 09:47:34 PM
Beautiful! I'm very impressed with the precision of your work
Title: Re: 1/32 Scale Stinson Gullwing
Post by: lastvautour on May 28, 2017, 09:58:28 PM
Post by: lastvautour on May 28, 2017, 09:58:28 PM
Thank you John. The fairings have been sanded down some to give it a more streamline look.
Lou
Lou
Title: Re: 1/32 Scale Stinson Gullwing
Post by: lastvautour on May 29, 2017, 08:48:23 PM
Post by: lastvautour on May 29, 2017, 08:48:23 PM
Making a model part 14.
The undercarriage fairing is small blocks glued and then carved to shape. The leg and wheel/wheel pants are similar small pieces of scrap wood cut to size and then sanded to rough shape. The last picture show the general arrangement prior to gluing the parts.
Lou


The undercarriage fairing is small blocks glued and then carved to shape. The leg and wheel/wheel pants are similar small pieces of scrap wood cut to size and then sanded to rough shape. The last picture show the general arrangement prior to gluing the parts.
Lou
Title: Re: 1/32 Scale Stinson Gullwing
Post by: lastvautour on May 29, 2017, 08:50:32 PM
Post by: lastvautour on May 29, 2017, 08:50:32 PM
Making a model part 15.
The legs blocks are glued and sanding has begun on the port side.
Lou

The legs blocks are glued and sanding has begun on the port side.
Lou
Title: Re: 1/32 Scale Stinson Gullwing
Post by: lastvautour on May 30, 2017, 11:16:47 PM
Post by: lastvautour on May 30, 2017, 11:16:47 PM
Making a model part 16.
Wheel pants carved and attached.
Lou

Wheel pants carved and attached.
Lou
Title: Re: 1/32 Scale Stinson Gullwing
Post by: Boomerang on June 04, 2017, 12:00:59 AM
Post by: Boomerang on June 04, 2017, 12:00:59 AM
Lou,
Looking good. It is always a pleasure to watch your tutorials.
Cheers
Gordon
Looking good. It is always a pleasure to watch your tutorials.
Cheers
Gordon
Title: Re: 1/32 Scale Stinson Gullwing
Post by: lastvautour on June 04, 2017, 02:01:35 AM
Post by: lastvautour on June 04, 2017, 02:01:35 AM
Thank you Gordon. More of a show and tell for the uninformed on Facebook re-posted here. I may attempt a detail tutorial on something easy in an attempt to attract new members from Facebook. My sister and her daughter have been forwarding the Gullwing post however so far just my relatives have been commenting. https://www.facebook.com/louis.vautour
Lou
Lou
Title: Re: 1/32 Scale Stinson Gullwing
Post by: lastvautour on June 10, 2017, 10:36:03 PM
Post by: lastvautour on June 10, 2017, 10:36:03 PM
Making a model part 17.
All major parts are glued and primer has been applied. Now several sanding are needed and more primer until the finish is to my liking.
Lou


All major parts are glued and primer has been applied. Now several sanding are needed and more primer until the finish is to my liking.
Lou
Title: Re: 1/32 Scale Stinson Gullwing
Post by: lastvautour on June 21, 2017, 10:27:39 PM
Post by: lastvautour on June 21, 2017, 10:27:39 PM
Making a model part 18.
Base coat applied using spray can. Now comes the red trim.
Lou


Base coat applied using spray can. Now comes the red trim.
Lou
Title: Re: 1/32 Scale Stinson Gullwing
Post by: johnnytodd on June 22, 2017, 01:50:32 AM
Post by: johnnytodd on June 22, 2017, 01:50:32 AM
Nice work Lou!
Title: Re: 1/32 Scale Stinson Gullwing
Post by: lastvautour on June 22, 2017, 10:22:47 AM
Post by: lastvautour on June 22, 2017, 10:22:47 AM
Thank you John.
Lou
Lou
Title: Re: 1/32 Scale Stinson Gullwing
Post by: Model Maker on June 24, 2017, 12:13:42 AM
Post by: Model Maker on June 24, 2017, 12:13:42 AM
Lou - Another great addition to your collection!!
The accentuated ribs certainly add a realistic touch to the model. Wish I had your skill with the "rattle can".
-ken
The accentuated ribs certainly add a realistic touch to the model. Wish I had your skill with the "rattle can".
-ken
Title: Re: 1/32 Scale Stinson Gullwing
Post by: lastvautour on July 01, 2017, 09:17:26 PM
Post by: lastvautour on July 01, 2017, 09:17:26 PM
Making a model part 18 1/2. I was not planning on taking photos until the project was finished, but the misses snapped these. I am masking the rocker arm blisters.
Lou

Lou
Title: Re: 1/32 Scale Stinson Gullwing..............................(Completed 2 July 2017)
Post by: lastvautour on July 02, 2017, 02:22:58 PM
Post by: lastvautour on July 02, 2017, 02:22:58 PM
Roll out 2 July 2017.
Lou


Lou
Title: Re: 1/32 Scale Stinson Gullwing..............................(Completed 2 July 2017)
Post by: lastvautour on July 02, 2017, 02:25:08 PM
Post by: lastvautour on July 02, 2017, 02:25:08 PM
Additional photos.
Lou

Lou
Title: Re: 1/32 Scale Stinson Gullwing..............................(Completed 2 July 2017)
Post by: Boomerang on July 02, 2017, 09:23:30 PM
Post by: Boomerang on July 02, 2017, 09:23:30 PM
Well Done Lou ! Looks terrific.
Did you do the markings free hand or with home made decals?
I've been pondering a Monocoupe for a while.
Looks great mate.
Cheers
Gordon
Title: Re: 1/32 Scale Stinson Gullwing..............................(Completed 2 July 2017)
Post by: lastvautour on July 02, 2017, 10:37:27 PM
Post by: lastvautour on July 02, 2017, 10:37:27 PM
Thank you. The markings are masking tape from templates I made from cardboard and drawn on the tape and cut with a sharp blade. The tail serial number, Stinson logo and Mother Goose are printed decals.
Lou
Lou
Title: Re: 1/32 Scale Stinson Gullwing..............................(Completed 2 July 2017)
Post by: johnnytodd on July 02, 2017, 11:23:44 PM
Post by: johnnytodd on July 02, 2017, 11:23:44 PM
Nice Plane Lou!
Title: Re: 1/32 Scale Stinson Gullwing..............................(Completed 2 July 2017)
Post by: lastvautour on July 03, 2017, 12:38:33 AM
Post by: lastvautour on July 03, 2017, 12:38:33 AM
Thank you John.
Lou
Lou
Title: Re: 1/32 Scale Stinson Gullwing..............................(Completed 2 July 2017)
Post by: Model Maker on July 03, 2017, 01:06:39 AM
Post by: Model Maker on July 03, 2017, 01:06:39 AM
Lou - The colour scheme and details certainly makes the model stand out. A great combination of colours - ken
Title: Re: 1/32 Scale Stinson Gullwing..............................(Completed 2 July 2017)
Post by: Jim on July 03, 2017, 01:07:25 AM
Post by: Jim on July 03, 2017, 01:07:25 AM
Ooooooo--aahhhhhhh! Loverly...!
Oh, and your workshop is way too neat!
jim
Oh, and your workshop is way too neat!
jim
Title: Re: 1/32 Scale Stinson Gullwing..............................(Completed 2 July 2017)
Post by: lastvautour on July 03, 2017, 05:14:16 PM
Post by: lastvautour on July 03, 2017, 05:14:16 PM
Thank you Ken and Jim. A rare day were there is some work space.
Lou
Lou
Title: Re: 1/32 Scale Stinson Gullwing..............................(Completed 2 July 2017)
Post by: buccfan on July 03, 2017, 09:12:35 PM
Post by: buccfan on July 03, 2017, 09:12:35 PM
Excellent Lou, nice job with the red on white. Regards Paul J.
Title: Re: 1/32 Scale Stinson Gullwing..............................(Completed 2 July 2017)
Post by: lastvautour on July 03, 2017, 10:03:22 PM
Post by: lastvautour on July 03, 2017, 10:03:22 PM
That white is actually RV White(Recreational Vehicle). Thank you for the compliment.
Lou
Lou